You’ll smoke your tri-tip to perfection at 225°F for roughly 30 minutes per pound. Pull the meat 5–10°F below your target doneness—typically 120–125°F for medium-rare—since carryover cooking adds another 5°F during the essential 15-minute rest. This low-and-slow approach lets smoke penetrate deeply while promoting even edge-to-edge cooking. Monitoring internal temperature with a wireless probe prevents guesswork. Slice against the grain after resting for maximum tenderness. The details matter greatly when you’re aiming for restaurant-quality results.
Preparing Your Tri-Tip for Smoking
Before you season your tri-tip, you’ll need to trim it properly to guarantee even cooking and best smoke penetration. Using a sharp knife, expose the meat by removing the fat cap from the roast’s surface. Loosen the silver skin backing with your blade, then pull it away using a paper towel for better grip. Trim excess fat carefully to avoid removing valuable meat tissue. Your butcher may’ve already completed this step, so ask before purchasing. Remember that the grain of the meat runs in different directions on the two sections of the roast, divided by a line of fat, so you may want to plan your slicing strategy accordingly.
Next, you’ll apply a binder by brushing olive or high smoke point oil evenly across the top, bottom, and sides. This oil acts as an adhesive, helping your dry rub adhere correctly to the meat. Let the oiled roast rest fifteen minutes before seasoning, allowing the binder to set for ideal rub adhesion. For best results, apply Jeff’s Texas style rub generously over the entire oiled surface to build a flavorful crust. Proper seasoning is essential throughout the cooking process to achieve a tender, flavorful result. Choose a tri-tip with good marbling for enhanced flavor and juiciness during the smoking process. Consider balancing your rub with salty, sweet, and spicy elements to create depth of flavor similar to successful marinades. If you prefer a simpler approach, coarse salt alone can create an excellent crust that enhances the natural beef flavor. After grilling, allow the meat to rest for 10 minutes to redistribute juices before slicing thinly against the grain for optimal tenderness and flavor.

ATS-34 Steel – Forged with Traditional Japanese Precision.This boning knife blade is forged using time-honored Japanese craftsmanship and premium ATS-34 steel, a high-carbon steel known for its hardness and fine grain. Sharpened through a multi-stage wet grinding process—(Mizukensaku)—the edge achieves superior precision. This meticulous hand-forging reflects the spirit of Japanese blade-making, where durability meets refined artistry.

ATS-34 Steel – Forged with Traditional Japanese Precision.This Fillet Knife is forged using time-honored Japanese craftsmanship and premium ATS-34 steel, a high-carbon steel known for its hardness and fine grain. Sharpened through a multi-stage wet grinding process—(Mizukensaku)—the edge achieves superior precision. This meticulous hand-forging reflects the spirit of Japanese blade-making, where durability meets refined artistry.

【Work of Art】Our Huusk knives is the blending of traditional craftsmanship with modern knife-making techniques. In the making of our Huusk chef knives, the blacksmiths have used high-carbon steel ATS-34. From the heat treatment, forging, and sharpening edge, to assembling, each step is permeated with the intention and dedication of the skilled craftsman. This makes the Huusk Japan knife more harder and sharper than other boning knives.
Choosing the Right Smoking Temperature
Why does temperature control matter so much when smoking a tri-tip? Establishing ideal temperatures guarantees even doneness and develops that prized smoke ring. You’ll want to set your smoker to 225 degrees F, regardless of whether you’re using a pellet, electric, or traditional smoker.
Maintaining temperature control throughout the smoking process is non-negotiable. Preheat your smoker to 250 degrees F, then stabilize it at 225 degrees F before placing your seasoned tri-tip inside. This consistent low heat allows smoke flavor to penetrate deeply while promoting uniform cooking across the entire roast. The slow temperature rise at 225 degrees F creates even cook from edge to edge while helping to retain moisture in the meat. Smoke your tri-tip until it reaches 5°F below desired internal doneness temperature, then wrap it in foil or butcher paper for the final phase of cooking.
Most smokers—including Traeger and Camp Chef models—hold 225 degrees F steadily, making temperature stability achievable across various equipment types. Pellet grills excel at maintaining stable heat through automated pellet feeding systems that adjust fuel delivery based on temperature readings. A digital controller monitors temperature via sensors and precisely regulates pellet feeding and airflow, enabling consistent and controllable cooking results. Budget-friendly options like the Pit Boss 440 SERIES offer digital temperature control that makes maintaining steady smoking temperatures accessible even for beginners. The Z Grills 700D3 model maintains consistent temperatures even in cold weather conditions, making it a reliable choice for year-round smoking. Your built-in meat probe monitors real-time internal temperatures, eliminating guesswork. Monitoring the internal temperature is critical rather than relying strictly on timing, as outdoor conditions and smoker temperature consistency can influence the actual time needed.

【COMPATIBLE MODELS】- Digital Control Panel Replacement for MASTERBUILT 20071117, 20071217, 21071218, 20071317, 20071417, 20071517, 20071819, 20072318, 20074517, MB20071117, MB20071619, MB20071819, MB20072918, MB20073018, MB20077018, MB20077818, MB21072918, MB25071217 MB26071317, MB28071517. (TIPS: PLEASE CHECK COMPATIBILITY)

【Restores OEM Precision】-- Replaces worn-out Masterbuilt smoker control panels with factory-matched temperature accuracy—set and hold steady 100°F to 275°F via intuitive buttons, and monitor real-time chamber temp on bright LED display

Calculating Cooking Time by Weight and Temperature
How you calculate smoking time depends on two critical variables: your tri-tip’s weight and your smoker’s temperature setting. At 225°F, you’ll need approximately 30 minutes per pound, making a 2-3 pound roast smoke for roughly two hours. Lower temperatures require adjusting cooking time accordingly—at 180°F, expect a full hour per pound.
You’ll want to pull your meat 5-10°F below your target doneness. For medium-rare, that’s 125-130°F internal temperature. Checking temperature consistency across your smoker prevents hot spots from skewing results. Starting at 180F then finishing at 225F will give your tri-tip a juicier interior with a crispy exterior. The longer smoking time at lower temperatures allows the meat to become more tender and develop deeper smoky flavors.
After smoking and searing, rest your tri-tip for 15 minutes. During this rest, carryover cooking raises the temperature another 5°F, pushing your roast to final doneness. This resting period redistributes juices throughout the meat, ensuring ideal tenderness and flavor. Similar to achieving a juicy interior when cooking bratwurst indoors, maintaining moisture throughout the smoking process is essential for tender tri-tip. Using a reliable meat thermometer helps you monitor the internal temperature accurately and avoid overcooking. For hands-free monitoring throughout the cook, wireless probes with apps provide precision without constantly opening your smoker. Infrared surface thermometers can help you identify hot zones on your grill grates before placing the meat. Monitor your smoker temperature carefully, especially when cooking in colder outdoor conditions that can cause fluctuations.

Bluetooth Monitor Remotely: Govee Bluetooth meat thermometer lets you check the temperature of your grill, smoker, or oven from your phone. With this smart BBQ thermometer, you can multitask while grilling.

4-Sensor Accuracy in Two Probes: Unlock professional-grade monitoring. With two sensors per probe, you get four data points total, delivering precise readings of internal meat doneness and external cooking environment.

BBQOVN Smart Wireless Meat Thermometer,WiFi Unlimited Range Sub-1G (10X Stronger Than Bluetooth) 7 NIST-Certified Sensors ±0.5°F Accuracy with Smart Base for BBQ
Understanding Target Internal Temperatures
The difference between a perfectly smoked tri-tip and a disappointing one often comes down to nailing your target internal temperature. Several factors determining desired doneness include personal preference, guest expectations, and the meat’s natural tenderness characteristics.
A quality meat thermometer becomes your most critical tool, allowing you to pull your tri-tip at the precise moment before carryover cooking pushes it past your target. Medium-rare—the Santa Maria standard—pulls at 125-130°F and rests to 130-135°F. Medium requires 135-140°F pre-rest, reaching 140-145°F after. For rare enthusiasts, target 115-120°F, finishing at 120-125°F post-rest. Resting the meat for 10-15 minutes after removal from the smoker allows carryover cooking to complete the temperature rise without overcooking the exterior. For added precision, some pitmasters use the finger pressure technique to cross-check doneness alongside their thermometer readings. Instant-read thermometers like the ThermoWorks Thermapen ONE deliver ±0.5°F accuracy with 1-second read times, ensuring you never miss your target temperature. If you plan to monitor your tri-tip remotely while it smokes, consider a wireless grill thermometer with RF or Wi-Fi connectivity for reliable through-house range.
Don’t exceed these ranges. Beyond 145°F, you’ll sacrifice the tenderness that makes tri-tip special, risking the dry, tough texture associated with overcooked beef. Your thermometer guarantees you hit your mark consistently. Like other high-quality cuts, tri-tip benefits from proper resting time to allow juices to redistribute throughout the meat before slicing. If you want to achieve a perfect sear after smoking, consider using a grill with even heat distribution such as those with stainless steel construction or infrared burners.
Smoking Techniques for Optimal Flavor
Smoking techniques boil down to three indispensable variables: temperature control, wood selection, and strategic timing. You’ll start at 180°F for intense smoke flavor, allocating roughly one hour per pound. This initial phase demands consistent wood chip replenishment—oak or pecan work best for even smoke generation throughout your cook. Dry brining the meat beforehand with salt will enhance tenderness and allow the smoke to penetrate more effectively.
After establishing a solid bark, you’ll increase to 275°F for the final cooking phase. Your smoke timing adjustments here are pivotal; shift from heavy smoking to light smoke to prevent bitter flavors. Monitor your high-temp probe in the thermal center, targeting 110°F before the reverse sear. Reaching an internal temperature of 200°F is crucial for dissolving connective tissue and achieving brisket-like tenderness.
Position your tri-tip fatty side down on the grate for optimal indirect heat exposure. This placement guarantees even smoke penetration and consistent bark development across all surfaces.


Santa Maria Valley Red Oak Wood Chips includes Fire starter and Cherry wood Pellets. Hand selected and sourced wood from California’s BBQ heartland for bold, sweet smoke that enhances tri-tip, ribs, steaks, and chicken.
Monitoring Doneness Throughout the Process
Nailing the perfect doneness requires you to dial in your temperature monitoring from the smoking phase straight through to your final sear. Start checking internal temp regularly at the one-hour mark, targeting 118°F on your 2.5-pound roast at 225°F. Deploy a digital thermometer probe for continuous tracking, setting high-temp alarms at 200°F if you’re wrapping for extended smoking.
Pull your tri-tip at 115-120°F before reverse-searing for medium-rare results. This temperature accounts for the 10-15°F carryover rise during your rest period, landing you at your target 130-135°F. Monitor bark development around the two-hour mark—it should set at 160°F before wrapping. Rest fifteen to twenty minutes post-smoke, then verify final doneness with your Thermapen ONE. After the reverse-sear technique, allow the meat to rest for 5-10 minutes to lock in maximum juiciness. For best results, use a digital meat thermometer to track temperatures throughout the entire cooking process, ensuring accuracy and consistency from start to finish. An instant-read thermometer gives you the most reliable verification of your target temperature before serving. Always insert your thermometer probe into the thickest part of the meat to get the most accurate reading and avoid undercooking. The tri-tip roast is done when the internal temperature reaches 135 degrees Fahrenheit for medium-rare. Just as grilled fish benefits from a brief rest after cooking, resting the meat allows juices to redistribute throughout the tri-tip for optimal tenderness. Remember that internal temperature is the most reliable indicator for doneness, so resist the temptation to rely solely on time-based guidelines.

【Ultra-Fast & Precision Accurate】This meat thermometer digital delivers accurate readings within ±1°F/±1°C in just 2–3 seconds, with a wide temperature range of -58°F to 572°F (-50°C to 300°C). No more waiting over the heat - know your food's exact temperature instantly.
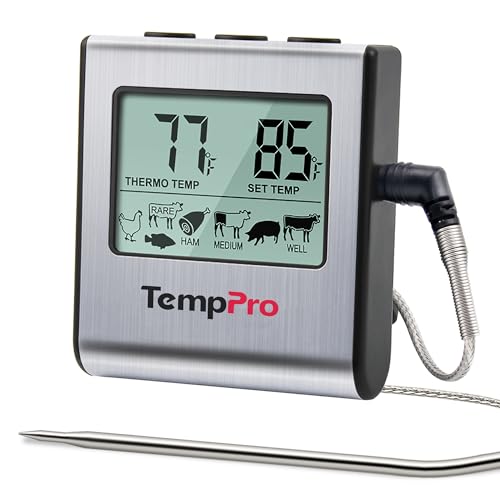
Cook mode with USDA preset temperature settings: TempPro cooking thermometer ideal for meat, oven, smoker or stove top; Programmable alert with preset temperatures for specific foods recommended by USDA; All of the preset temps can be reset to your desired tastes

Instant Read Food Thermometer | Our instant read thermometer features a temperature probe and advanced, highly accurate technology with 1-2 seconds response time; Instructions, meat temperature chart, comes pre-calibrated for your convenience, and recalibrating feature if needed.
Resting and Finishing Your Roast
Your tri-tip’s journey doesn’t end when it leaves the smoker—it’s just entering its most critical phase. Transfer your roast to a carving board and tent it loosely with foil for proper rest technique. You’ll need to adjust resting duration based on your cooking method: a standard 15-minute rest redistributes juices adequately, while reverse sear demands 20-30 minutes. Expect carryover cooking to raise your internal temperature roughly 10°F during this window.
Pull your roast at 120°F to achieve 130°F medium-rare after resting. This redistribution prevents juices from spilling onto your plate when you slice, ensuring succulence throughout. For extended resting periods of 1.5 to 2 hours, wrap tightly in foil and place in a dry cooler to maintain temperature stability during transport or advance preparation. For an even more impressive finish, consider topping with butter before resting to add richness and enhance the roast’s natural flavors. If you prefer a charred exterior, briefly sear the rested tri-tip on a hot grill where radiant heat from the embers creates an irresistible crust. Before searing, wipe your grill grates with high-temperature cooking oil to prevent sticking and enhance browning. Remember to slice against the grain to maximize tenderness and break down muscle fibers for the most tender bites. Use an instant-read thermometer throughout the process to ensure precise temperature control and optimal results. Once you’re finished cooking, allow your smoker to cool completely before placing a weather-resistant cover over it to protect your investment from the elements. Don’t rush this phase—patience yields the moist, flavorful results that transform good tri-tip into exceptional barbecue.
Slicing and Serving Recommendations
How you slice your tri-tip matters as much as how you’ve cooked it—perhaps more so. You’ll need to identify the grain direction by locating the elbow joint on top of the steak, then adjust your slicing angle accordingly. The thinner side requires a 45-degree angle, while the thicker end demands a full 90-degree turn for proper slicing orientation.
Maintain uniform slice thickness throughout—thin slices break down muscle fibers more effectively than standard cuts, delivering superior tenderness. Use a fork to hold the meat rather than pierce it during carving. Separate specific sections from the main roast for selective slicing, leaving portions unsliced on your presentation board. This approach maintains visual appeal while accommodating different group sizes and individual preferences at the table. Country music often accompanies outdoor barbecue gatherings where tri-tip roasts are traditionally served to family and friends.