
You’ll master picanha by respecting its distinctive triangular shape and buttery fat cap—Brazil’s most celebrated beef cut. Select prime-grade meat with at least 1.5cm of well-marbled fat, trim excess silver skin, and score that protective cap to enhance rendering. The fat self-bastes during cooking while shielding lean meat from direct flame. With proper selection, preparation, and technique, you’ll achieve the perfectly charred, juicy results that define authentic churrascaria excellence. There’s more to unveil about seasoning, heat management, and slice perfection ahead.
What Is Picanha
Picanha—Brazil’s most celebrated beef cut—commands reverence across South American grilling cultures for good reason. You’ll recognize this premium churrasco staple by its distinctive triangular shape and thick, buttery fat cap that crowns one side. Derived from the rump cap muscle in the cow’s hindquarter, picanha boasts lean meat composition beneath that protective fat layer, which self-bastes during cooking while shielding the meat from direct flame heat.
When identifying quality picanha, you should examine the intact fat cap—it’s essential for authentic flavor development. The cut delivers deeply beefy, complex notes with a rich, buttery texture that emerges as fat infuses the meat. In North American markets, you’ll find it labeled as rump cap, sirloin cap, or culotte steak, though nothing matches the genuine Brazilian experience this versatile cut provides. This superior cut showcases the skill of butchery and the refined flavors that expert cooking techniques can unlock. For optimal results, the meat should reach room temperature before cooking to ensure even doneness throughout the cut. Achieving the perfect sear requires adequate heat output, whether you’re using charcoal or a high-BTU gas grill. If you’re investing in a quality gas grill for your picanha sessions, models with cast-iron grates deliver superior heat retention and professional-grade searing capabilities. These grates require proper seasoning and maintenance to prevent rust and ensure long-lasting performance. Like premium cuts such as New York Strip or Ribeye, picanha benefits from good marbling that enhances both flavor and tenderness during the grilling process. High-performance grills like the Weber Genesis models excel at searing steaks with minimal flare-ups thanks to their porcelain-enameled grates and consistent heat distribution.
Selecting and Preparing Meat
Your success with picanha hinges entirely on selecting the right cut from the start. Seek prime-grade meat from trusted butchers with well-marbled fat distribution and bright red coloring. Inspect the fat cap—you’ll want at least 1.5cm thickness for paramount moisture retention. Check packaging for minimal liquid, indicating proper handling.
Trim excess silver skin while preserving the protective fat cap intact. Score the fat cap to enhance rendering and crust development. Your meat quality inspection should confirm proper trimming before portioning. The fat cap renders down during cooking, infusing the meat with moisture and flavor that defines authentic picanha. Picanha is surrounded by a thick layer of fat that contributes to its exceptional juiciness when cooked properly.
Cut steaks 1.5 to 2 inches thick, following grain direction initially. Customized trimming preferences depend on your cooking style, but maintain that key fat layer. For optimal searing results, ensure your grill offers excellent temperature control to create the perfect crust while keeping the interior tender. Gas grills with cast iron grates deliver superior heat retention and the intense searing surface necessary for developing a perfect crust on picanha. After cooking, allow your picanha to rest for 10 minutes so the juices can redistribute throughout the meat. Using a meat thermometer helps you monitor the internal temperature accurately and avoid overcooking your premium cut. Rather than relying solely on cooking times, checking internal temperature provides the most reliable indicator for achieving your desired doneness. Complete all preparation immediately before grilling to preserve freshness and deliver superior results.
Seasoning Methods
Once you’ve prepared your picanha with a pristine fat cap, seasoning becomes the next critical frontier—and here’s where Brazilian tradition meets personal preference.
You’ll find three compelling approaches. The purist route employs coarse salt exclusively—roughly ¼ cup per whole steak—allowing beef’s natural flavors to dominate. For balanced simplicity, you can combine kosher salt and freshly ground black pepper in equal parts (1 tbsp each), seasoning slices methodically.
To build complexity, craft a Brazilian steak seasoning blend using precise seasoning ratios: 1 tbsp kosher salt, 1 tbsp black pepper, 1 tbsp garlic powder, 1 tbsp onion powder, 2 tsp smoked paprika, 1 tbsp ground coriander, and 1 tbsp mustard powder. Apply 3 tsp per 2 pounds. This versatile blend also enhances other cuts of beef, so consider making a larger batch for future grilling sessions. The picanha is a richly flavored, tender cut that deserves seasoning methods that respect its natural qualities without overwhelming them.
Whichever seasoning blends you choose, apply generously to all sides before grilling, or dry brine with coarse salt overnight for enhanced depth. For even better results, let it come to room temperature before placing it on the grill to ensure more consistent cooking throughout. Before firing up your grill, brush the grates lightly with high-smoke-point oils like refined avocado or grapeseed to prevent sticking during the high-heat searing process. Monitor the internal temperature with a reliable meat thermometer to achieve your desired level of doneness precisely. Whether you’re using a budget-friendly grill under $500 or a high-end model with infrared searing capabilities, proper temperature control remains essential for perfect picanha. If you’re cooking on a built-in outdoor kitchen grill, verify that your BTU output matches your cooking needs to maintain consistent high heat for optimal searing.

Convenient seasoning blend

NATIVE INGREDIENTS – Each blend features carefully selected organic spices and herbs, such as organic maple, garlic, and mesquite, ensuring authentic and rich flavors in every use.

Dual Bottle Package: TWO shaker bottles of seasoning included in this convenient set
Grill Setup
With your picanha perfectly seasoned and ready for heat, you’ll now need to establish the proper grill environment to execute a flawless sear and cook.
Your lighting procedure determines everything. For charcoal, preheat to 500+ degrees F with vents fully open, using lump charcoal for superior flavor. Allow 15 minutes for stabilization. Gas grills require 10-15 minutes at high heat, reaching 450-500 degrees F. You can use your preferred lighting method such as a chimney starter or lighter fluid for charcoal grills. If you don’t have a chimney starter, arrange charcoal in small piles over fire starters to build heat gradually.
Temperature control separates mediocrity from mastery. You’ll create a two-zone setup: a blazing hot zone for searing at 500 degrees F, and a cooler zone for even cooking. Brush grates lightly with olive oil before heating to prevent sticking. Maintaining proper airflow throughout the cook ensures consistent temperature control for optimal results. Using fewer starter cubes than package directions suggest is often sufficient to ignite your charcoal efficiently. Modern charcoal grills with built-in starters can simplify the ignition process and help you achieve stable temperatures more quickly. Many experts recommend using the top lid damper to fine-tune your heat levels during the cooking process.
Position your skewered picanha between zones or on a spit. This strategic arrangement enables you to sear aggressively while maintaining precise internal temperature regulation, targeting 125-130 degrees F for medium-rare perfection. The rotisserie-style cooking helps baste the juices and provide an even color throughout the meat.
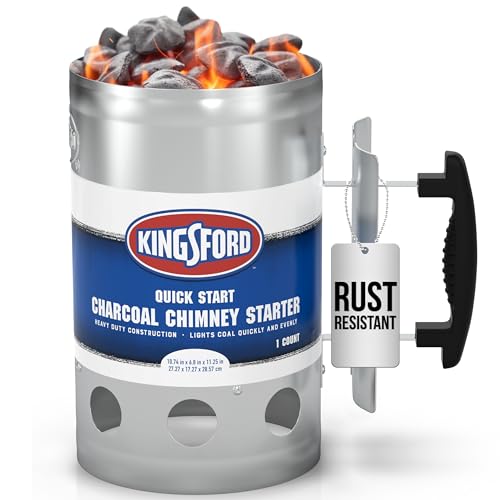
FAST CHARCOAL LIGHTER PULLS STEADY AIRFLOW FOR EVEN IGNITION: Helps get briquettes lit quickly and more evenly by pulling steady airflow through the chimney, reducing time from lighting to cooking for grills, smokers, and kettles.
Lights coals in under 15 minutes. Dimensions : 8 H x 5.8 W x 10.4 D inches

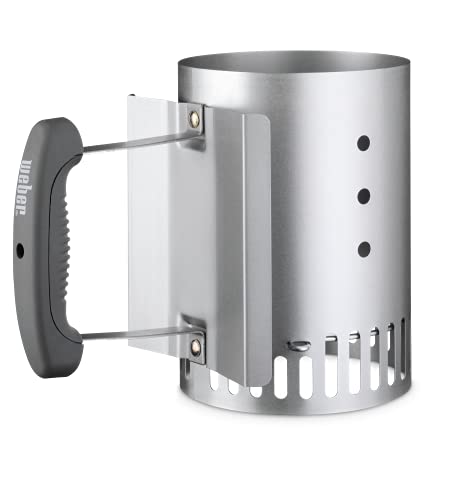
COMPACT STARTER — MEASURES 8.1 x 5.7 x 10 INCHES: This chimney starter is intentionally compact, measuring 8.1 inches wide by 5.7 inches deep by 10 inches tall. Designed for small to medium sized grills. Not a full-sized chimney — check dimensions.
Grilling Techniques
As you shift from grill setup to execution, mastering the fundamental techniques‘ll transform your picanha from merely cooked to absolutely exceptional. Start by returning sliced steaks to room temperature, then sear flesh-side down for two minutes on direct heat. Flip to the fat side for another two minutes, allowing the cap to render beautifully. Rotate diagonally during flips to achieve crosshatch grill marks that enhance presentation and flavor.
Maintain even heat distribution by working between your hot and cool zones every 2-3 minutes. This two-zone approach mimics rotisserie cooking, preventing charring while ensuring thorough cooking. Position your fat cap facing the heat source during indirect phases for ideal rendering. The fat cap is what helps to give this steak so much amazing flavor. Do not remove the fat cap, as it is what makes this cut of meat unique and contributes to the unbeatable texture and juiciness. Temperature monitoring‘s pivotal—aim for 130 degrees Fahrenheit internal temperature. Using an instant-read thermometer ensures precision and helps you achieve your desired doneness without guesswork. For serious pitmasters demanding the highest accuracy, the ThermoWorks Thermapen ONE delivers ±0.5°F precision with 1-second read times. For hands-off monitoring during longer cooks, consider wireless meat thermometers that let you track internal temperature through a smartphone app without constantly opening the grill. After grilling, let the steak rest to allow residual heat to finish the cooking process for optimal juiciness. The initial searing triggers the Maillard reaction, creating a flavorful crust that locks in the meat’s natural juices. Total cook time runs 15-20 minutes with frequent flipping, ensuring perfectly cooked, juicy picanha.

Instant Read Food Thermometer | Our instant read thermometer features a temperature probe and advanced, highly accurate technology with 1-2 seconds response time; Instructions, meat temperature chart, comes pre-calibrated for your convenience, and recalibrating feature if needed.

2.0 inches large auto-rotating backlit display: Digital food thermometer has a 180° auto-rotating backlit display, making this kitchen thermometer perfect for left-hand users and allows you to use it in low light conditions

【8X Faster + 4X More Precise】: Upgraded with an industrial-leading professional thermocouple sensor, Themomonster meat thermometer digital with NIST certified ±0.5℉ precision provides you the accurate temperature of your food in just 0.5 Seconds.
Doneness and Resting
The difference between a mediocre picanha and an exceptional one comes down to precision timing and patience. You’ll remove your steak from heat at 130°F, allowing carryover cooking to push it to your target 135°F for medium-rare. This temperature precision prevents overcooking while ensuring ideal juiciness maintenance.
Insert your instant-read thermometer into the thickest section, avoiding bone contact. Don’t slice immediately—that’s critical. Instead, rest your picanha for 10-15 minutes. During this period, juices redistribute throughout the meat fibers, preventing moisture loss that ruins texture. Temperature will rise about 5°F during resting, so account for this final adjustment in your cooking strategy. For optimal results, slice against the grain into thin slices once the resting period is complete. Consider topping your finished steak with compound butter to enhance the flavor and add richness.
Your patience here determines everything. That resting phase transforms a potentially dry steak into a tender, juicy masterpiece. This crucial step allows the juices to redistribute evenly, ensuring every bite delivers maximum flavor and tenderness. Proper seasoning throughout the cooking process enhances the natural flavors of the meat and contributes to the overall success of your picanha. After resting, you can finish with a high-heat sear to develop an irresistible crispy crust that contrasts beautifully with the tender interior. Bringing your steak to room temperature before grilling ensures more even cooking throughout. Respect the process, trust your thermometer, and you’ll achieve restaurant-quality results every time.
Slicing and Serving
Your perfectly rested picanha demands respect when you pick up the knife—understanding grain direction isn’t optional, it’s foundational. You’ll slice against the grain at a perpendicular slicing angle to maximize tenderness and prevent chewiness that disappoints diners.
Cut thin slices that showcase your meat’s character. The rendered fat cap has naturally basted your roast during cooking, creating a flavorful crust you’ll preserve with each stroke. Your fat cap management determines the balanced bite—position it at slice edges so diners experience lean meat married with rich fat. The fat cap adds additional flavor to every bite. When slicing a cooked picanha roast, work against the grain to achieve those tender, melt-in-your-mouth pieces that highlight the meat’s natural quality. After removing your steak from the grill, let it rest for 10-15 minutes to allow the juices to redistribute throughout the meat. The charcoal embers produce radiant heat that travels upward to cook your picanha directly, creating that perfect exterior crust.
For churrascaria service, fold thick-cut steaks into crescent shapes and skewer them. This presentation allows dramatic tableside slicing directly onto plates, delivering theatrical service alongside perfectly tender, flavorful portions that justify your meticulous preparation. Flat metal skewers provide superior grip to prevent the meat from spinning during cooking and carving, ensuring safe and consistent presentation at the table. If you’re cooking outdoors, consider using a griddle with pre-seasoned surfaces for easier cleanup and consistent heat distribution across the cooking area. Protect your deck from grease splatters and heat damage by placing a grill mat underneath your cooking area to catch spills and prevent staining.
Tips for Perfect Results
When you’re ready to elevate your picanha game, success hinges on mastering a few critical fundamentals that separate mediocre results from championship-caliber grilling. Prioritize temperature control by maintaining your charcoal grill between 400-500 degrees Fahrenheit for ideal searing. Use lump charcoal instead of briquettes for superior heat distribution and authentic flavor. lump charcoal delivers the high heat necessary for proper searing while burning cleanly to preserve the natural beef flavor of picanha. Position your fat cap toward the indirect heat side, allowing gradual fat rendering without triggering flare-ups. Score that distinctive fat layer with a sharp knife to enhance rendering and juiciness throughout. Implement frequent flipping every 2-3 minutes during high-heat cooking to recreate rotisserie results. Lather exposed meat surfaces with olive oil before grilling to compensate for moisture loss. The thick fat cap characteristic of picanha requires careful attention during the grilling process to ensure even cooking and optimal flavor development. For optimal results, choose premium lump brands like Jealous Devil or Rockwood that produce minimal ash and provide responsive temperature control essential for precision grilling. Natural hardwood charcoal options outperform flavored or additive-laden products that can interfere with the pure beef taste you want to showcase. If you want to add a subtle smoky dimension to your picanha, consider incorporating oak wood chips for a medium smoky profile that complements beef without overpowering its natural flavor. Unlike briquettes that maintain consistent broiling temperatures around 600°F, dense carbon hunks of lump charcoal allow for better refueling during extended grilling sessions without producing excessive smoke. Allow the steaks to rest for 5-10 minutes after removing them from the grill, wrapped in foil to retain heat and redistribute juices throughout the meat. These technical adjustments transform your picanha into restaurant-quality perfection.

20 pounds of 100 percent natural lump charcoal


Dense Hardwood Performance: Made from dense South American quebracho blanco hardwood that burns hotter and longer than standard lump charcoal with consistent heat output and reduced wood consumption


