You’ll smoke St. Louis ribs for 5–6 hours using the 3-2-1 method: three hours unwrapped at 225°F, two hours wrapped in foil, then one hour unwrapped with sauce. Alternatively, increase temperature to 275°F and reduce total time to 4.5–5 hours. Target internal temperatures between 180–200°F for ideal tenderness. Spritz every 30–45 minutes during the first phase, then wrap tightly to trap moisture. The specifics of timing, temperature adjustments, and doneness indicators reveal why methodology matters for consistent results.
Preparing Your St. Louis Ribs
Before you season your ribs, you’ll need to remove the membrane from the underside—a critical step that directly impacts flavor absorption and tenderness. Insert a butter knife between the membrane and bone to loosen it, then grip the membrane with paper towels for better traction and pull it away completely.
Next, select St. Louis style ribs with even marbling throughout the rack. Avoid ribs displaying dry edges, which indicate poor quality or improper storage. If using spare ribs, trim them at home to achieve St. Louis proportions while reducing costs. St. Louis style ribs are meatier and more flavorful than baby back ribs, with a little more fat that keeps them juicy. The rectangular, uniform shape of St. Louis ribs provides better results when cooking and ensures consistent heat distribution across your charcoal grill. For additional cooking versatility on your grill, consider incorporating cast iron grill pans that offer superior heat retention and durability for complementary dishes. When selecting your smoking grill, prioritize 304 stainless steel construction for durability and corrosion resistance during extended outdoor use.
Pat your ribs dry with paper towels after membrane removal. This preparation improves seasoning application adhesion greatly. For optimal results, apply a well-balanced dry rub that will enhance the natural flavors of your meat. Arrange ribs in a single layer on your cooking surface to guarantee consistent, even heat distribution throughout the smoking process.

Steakhouse Sear At Home: The Lodge Square Cast Iron Grill Pan delivers high-heat searing and bold grill marks while channeling excess grease away

Enclosed design keeps ribs moist and cook faster than cooking normally on the grid surface or in a smoker

Fabric Type: Rubber
Setting Up Your Smoker
Once you’ve prepped your ribs, you’ll need to configure your smoker for ideal results. Start by preheating your smoker to 225°F for low-and-slow cooking, then adjust to 230°F using indirect heat setup. Position your water pan to stabilize temperature fluctuations and maintain consistent moisture. Select hickory wood for robust flavor, considering wood moisture content to optimize smoke quality over your 3-4 hour smoking duration. Set your vent approximately 1/3 open to regulate airflow and smoke density. For pellet cookers, target 275°F on the top rack for even exposure. Arrange your ribs bone side down on offset grates, ensuring they’re positioned away from direct heat. Make sure your smoker is capable of maintaining 230°F to keep temperature consistent throughout the entire cooking process. Many pitmasters utilize the 2-2-1 method to achieve optimal tenderness and calorization during the smoking process. Monitor temperature closely to prevent unwanted fluctuations throughout the smoking process, as this directly impacts the quality and texture of your final product. Like larger cuts of meat, ribs may experience a temperature stall during cooking where progress slows due to moisture evaporation. Using a meat thermometer to track internal temperatures ensures your ribs reach the desired doneness without overcooking. After the initial smoking phase, plan to braise your ribs in a foil-covered pan with BBQ sauce and liquids to further tenderize the meat and develop deeper flavor.
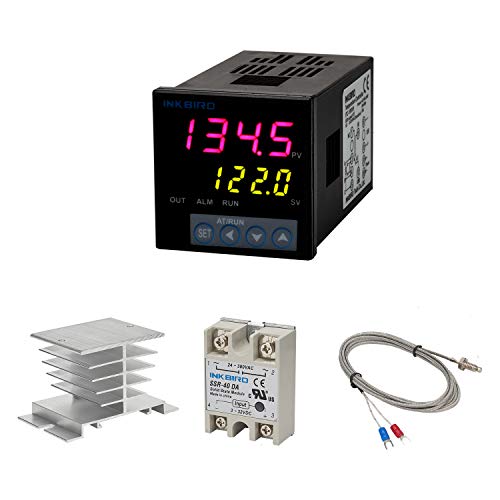
Alarm Output: With 1 alarm relay output, AC250 V, 3 A (Resistive load), ON or NC, you can wire a buzzer

【Restores OEM Precision】-- Replaces worn-out Masterbuilt smoker control panels with factory-matched temperature accuracy—set and hold steady 100°F to 275°F via intuitive buttons, and monitor real-time chamber temp on bright LED display

Product Applications: 1650W Universal Electric Heating Element for Electric Smokers and Electric Grills. Compatible with Smoke Hollow, Masterbuilt, Char-Broil, Cuisinart, and Dyna-Glo. Please ensure it matches your model number
Smoking Timeline and Temperature Guide
The smoking process for St. Louis ribs requires precise timing and strategic temperature adjustments. You’ll achieve bite-through tender results at 275°F within 4.5–5 hours, though 250–275°F offers flexibility across 3–4 hours total.
Start with an initial unwrapped phase at 250–275°F for 2 hours, spritzing every 30 minutes to manage smoke flavor intensity. Next, wrap your ribs for 1–1.5 hours, then finish unwrapped for 10–20 minutes to set the bark. Consider adding moisture enhancers like butter and brown sugar inside the foil during the wrapping phase to keep your ribs juicy and tender. Popular pellet flavors such as hickory, pecan, and cherry blends complement the pork well and enhance the overall smoking results.
You can adjust toward lower temperatures (225°F) for extended low-and-slow cooking spanning 5–5.5 hours if preferred. Many pitmasters reach internal temperatures near 180-200°F as an indicator of optimal tenderness and flavor development. St. Louis ribs typically feed 2-3 adults due to their larger size, making them an excellent choice for entertaining. Before wrapping, ensure you’ve removed the membrane on the back to allow smoke and rub to penetrate deeply into the meat. Monitor your internal temperature target of 195–200°F, checking doneness via the bend test alongside your probe readings for consistency and perfect results.

PREMIUM MATERIALS - Cook or grill for years to come and never worry about rust or corrosion with an ultra-durable rib rack made out of stainless steel.
20 Lb Bag of Jack Daniel's Tennessee Whiskey Flavored Pellets
Premium Smoking Wood Pellets – Apple Pellets, 1 Pint - Elevate your grilling and smoking experience with our high-quality wood pellets. Our kiln-dried barbecue smoking pellets ignite quickly and combust completely to create a delicate smoky flavor.
The 3-2-1 Method Explained
One of the most reliable frameworks for smoking St. Louis style ribs is the 3-2-1 method. You’ll smoke unwrapped ribs for three hours at 225°F, allowing you to control smoke density while choosing ideal wood chips that infuse deep flavor and form bark. Next, you’ll wrap them tightly in foil with liquids for two hours, steaming the meat to tenderness. The foil wrapping works by trapping heat and moisture, which gently tenderizes the meat through gentle steaming. Finally, you’ll unwrap and sauce them for one hour, building that glazed exterior. This methodical approach yields consistent results with internal temperatures reaching 190-200°F. You can adjust timings slightly—try 2:45-1:45-0:45 for refined results. Monitoring your ribs with a meat thermometer ensures you achieve the desired doneness throughout the cooking process. Rest your ribs wrapped in foil for thirty minutes afterward, ensuring juice redistribution for maximum tenderness and flavor retention. The Elliot Ness BBQ Sauce recommended for this method adds a complex sweetness that complements the smoky bark developed during the initial cooking phase.


Spritzing and Wrapping Techniques
To maximize moisture retention and tenderness during your smoke, you’ll want to start spritzing about an hour after placing your ribs on the smoker—this timing allows the meat’s pores to open fully and accept the liquid. Continue every 30-45 minutes for approximately 2-2.5 hours, applying 8-10 sprays per rack during each session.
Your spritzing composition should consist of equal parts apple cider vinegar and apple juice, a proven formula that prevents surface drying while promoting bark development and flavor penetration. This spritzing duration extends your total cook time by roughly one hour but produces noticeably more tender results with improved moisture retention. The low temperature smoking process allows the ribs to absorb smoke flavor and break down connective tissues effectively. Remember that temperature is the most important factor in achieving consistent results throughout your smoking process.
Once your ribs achieve mahogany brown coloring after 2-2.5 hours, shift to wrapping with aluminum foil or butcher paper containing brown sugar and butter. For best results, maintain smoker temperature at 275 degrees while your ribs rest in the wrapped foil for the final cooking phase. Using adjustable grates on your smoker allows you to fine-tune heat distribution and prevent hot spots during the wrapping stage. When checking for doneness, use probe tenderness testing rather than relying solely on internal temperature readings. Position meat-side down on this sweet base, allowing the steam to further tenderize your ribs before final plating. Unlike the 30-minute gas grill method, the traditional smoking approach prioritizes low and slow cooking for superior flavor development. The hot and fast method at higher temperatures can significantly reduce overall cooking time compared to traditional smoking approaches.


32 fluid ounces of organic apple cider vinegar

SMOKERS CHOICE is The Original Apple Cider Vinegar Spray, Providing Richer Smoke Flavors While Maintaining Meat Moisture Helping Rubs Absorb Better
Testing for Doneness
After you’ve wrapped your ribs and allowed the steam to work its magic, you’ll need to verify they’ve reached ideal doneness before removing them from the smoker.
Start with internal temperature readings using an instant-read thermometer inserted between bones in the thickest sections. Target 195°F to 203°F, with 198°F as your optimum sweet spot for St. Louis style ribs. Take multiple readings across the rack to account for hot spots.
For meat tenderness evaluation, employ the bend test by lifting the rack with tongs—it should flex easily into a U-shape with visible surface cracking between bones. Use the toothpick method as confirmation: a wooden skewer should slide between bones with minimal resistance, pulling out cleanly without tugging. Remember that ribs can retain pink color when fully cooked, so don’t rely on appearance alone. While traditional visual and tactile cues are helpful progress checks, internal temperature remains the most reliable indicator of true doneness. For St. Louis style ribs, aim for the meat to reach approximately 200-205°F for optimal tenderness. Using a probe thermometer will help you monitor doneness effectively throughout the smoking process. Verify meat recession of approximately 1/4 inch from bone tips and clear juices. These methodical checks guarantee perfect results.
Resting and Serving Your Ribs
Now that you’ve verified your ribs have reached ideal doneness, the resting phase becomes critical to your final result. You’ll maintain heat and moisture by wrapping your ribs in foil for a minimum of 10-15 minutes, though 30 minutes optimizes juice redistribution throughout the meat. This resting time importance can’t be overstated—omitting it allows juices to seep out immediately upon serving. After resting, wipe down your grill grates with a grill brush to remove any residual debris before serving. For optimal cleaning results, consider using bristle-free grill brushes which eliminate the risk of wire bristles contaminating your food. To maintain your grill’s longevity between uses, incorporate routine gate maintenance into your post-cooking cleanup ritual.
When you’re ready to serve, employ proper slicing techniques by cutting between the bones meat-side down. This approach creates individual portions while preserving maximum moisture. You’ll slice immediately before serving to prevent juice loss. For fall-off-the-bone texture, ensure your ribs reached 195F to 200F internal temperature before resting. A bend and toothpick test confirms doneness more reliably than temperature alone. Bristle-free coiled designs effectively tackle stubborn grime without leaving residues that could contaminate your finished ribs. For safer grill maintenance, try using aluminum foil as a scrubbing tool to clean grates between cooking sessions. For storage, refrigerate foil-wrapped ribs up to four days, or freeze them tightly wrapped for three months. Reheat at 250°F for 20-30 minutes covered in foil, revealing the final five minutes for texture.