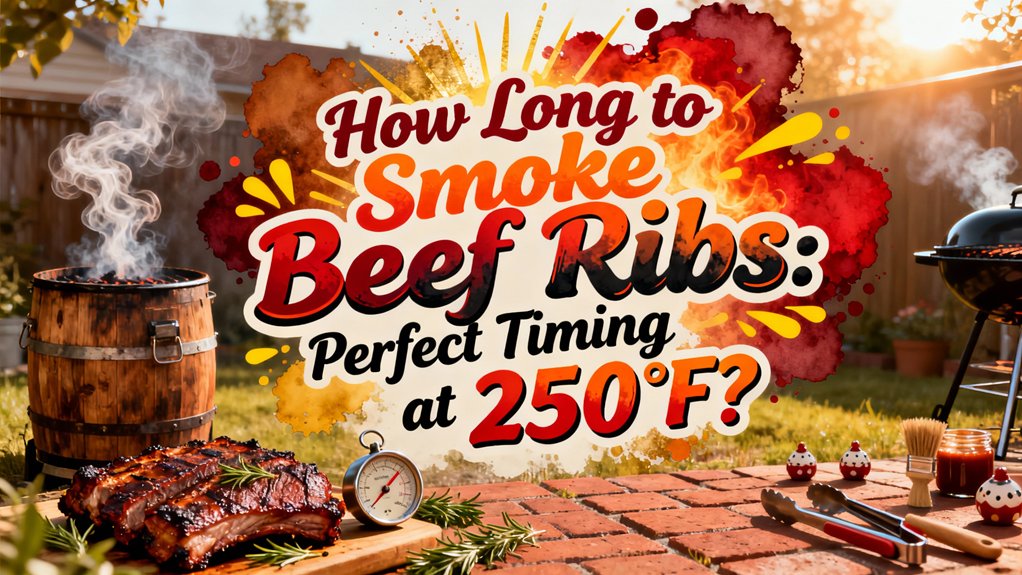
You’ll smoke beef ribs perfectly at 250°F in 3 to 8 hours, depending on size. Smaller 2-2.25 pound racks need about 3 hours, while 4-5 pound plate ribs require 6-8 hours. Internal temperature matters most—aim for 200°F-205°F when collagen’s fully gelatinized above 190°F for 2+ hours. Wrap halfway through to prevent overcooking. The specifics of rib preparation, monitoring techniques, and resting methods can substantially elevate your final results.
Why 250°F Is the Ideal Smoking Temperature for Beef Ribs
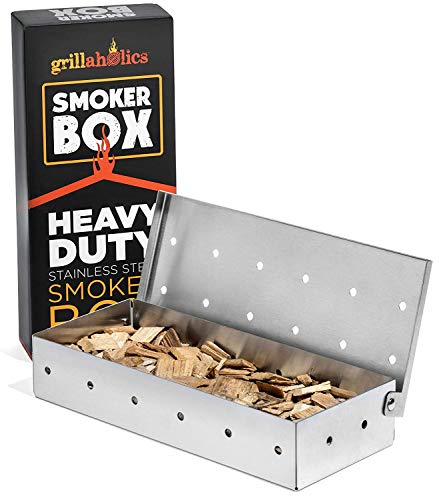
Why does 250°F consistently outperform other temperatures for smoking beef ribs? You’ll achieve superior fat render quality and smoke ring formation that lower temperatures can’t match in reasonable timeframes. At 250°F, you’re hitting the sweet spot—fat renders evenly during your 8-10 hour smoke without the toughness that higher temps like 325°F create. Your collagen breaks down thoroughly, delivering fall-off-bone tenderness when you hit that 205°F internal target. Meanwhile, your bark develops that firm, flavorful crust from balanced smoke absorption and crust development over the initial 3-4 hours. You’re avoiding the extended cook times of 225°F without sacrificing the tenderness and juiciness that define exceptional beef ribs. It’s the middle ground that delivers results. To maintain this ideal temperature, use vent adjustments to keep your grill steady within the 225–250°F range, similar to how managing airflow through dampers and vents controls oxygen supply and temperature stability on any grill. For charcoal grill users, placing a smoker box over coals allows you to infuse wood chip smoke while maintaining consistent heat levels throughout your cook. Remember to remove the membrane on the bone side before applying your seasoning to ensure proper smoke penetration and tenderness. For best outcomes, pair your 250°F smoking temperature with dry, seasoned wood that has been properly aged to ensure optimal smoke flavor and penetration throughout your cook. Hickory and oak are premium hardwoods that deliver exceptional results for beef ribs through their slow-burning properties and distinct savory flavors.
A TOP GRILLING GIFT FOR MEN - and a simple BBQ stocking stuffer that instantly upgrades any gas grill. This stainless-steel smoker box delivers real wood-smoked flavor and fits perfectly into the best grilling gifts under $25 category—useful, durable, and unforgettable.


Thicker sturdy stainless steel construction will hold up great under the heat of the grill. With the unique hinged design, you can easily add or remove wood chips from the smoker box while in use.
Calculating Cook Time Based on Rib Weight and Size
Now that you’ve locked in 250°F as your smoking temperature, you’ll need to calculate your actual cook time—and here’s where rib weight and size become your primary variables. For 2-2.25 pound racks, expect approximately 3 hours. Larger 4-5 pound plate ribs typically require 6-8 hours at this temperature.
Meat quality factors and rib bone structure greatly influence duration. Rib bone in versus boneless sections cook differently due to varying heat penetration rates. Denser bone mass extends cooking time proportionally. Back ribs and short ribs are common beef rib cuts that require attention to their specific bone structures during the smoking process. Similar to brisket smoking, monitoring the temperature plateau or stall phase helps you anticipate when your ribs are approaching doneness. Like brisket, beef ribs are naturally tough and require low and slow cooking to break down collagen effectively. Applying a well-balanced dry rub before smoking enhances flavor while the low temperature works to tenderize the meat. For best results, aim to reach an internal temperature of 208-210°F to ensure your ribs are probe-tender and well-rendered. Allowing proper rest time after smoking helps the meat retain its juices and reach optimal tenderness. The 3-2-1 method can also provide a reliable alternative framework for timing your cook.
Rather than relying solely on weight estimates, probe for tenderness as your primary doneness indicator. Target an internal temperature of 203-205°F. This approach accounts for individual variations in membrane thickness, bone density, and smoker configuration that weight calculations alone can’t capture.

Weber Smoky Brown Sugar Dry Rub, 12 Ounce Shaker

BOLD, SMOKY TASTE: Cattlemen’s Cowboy Rub delivers a bold flavor profile with a blend of hickory smoke, molasses and coffee, infusing your favorite BBQ dishes with an irresistibly robust taste
THE PERFECT FATHER’S DAY GIFT FOR BEEF LOVERS – Looking for Father’s Day gift ideas for dad, Father’s Day gifts for husband, or BBQ gifts for men? This Texas-inspired beef rub delivers bold, pitmaster-approved flavor for anyone who loves grilling steaks, smoking brisket, and cooking authentic barbecue.
Understanding Internal Temperature Targets for Perfect Doneness
While weight-based timing gives you a starting point, internal temperature is what actually determines whether your beef ribs’ll pull apart or require a knife. You’ll want to target 200°F-205°F for ideal doneness, probing horizontally through the thickest meat section between bones.
Here’s the critical distinction: the USDA’s 145°F safety minimum won’t achieve tenderness. You’ll need sustained heat above 190°F for 2+ hours to fully gelatinize collagen. Anything below 160°F leaves meat chewy and rubbery. Unlike color, which can be misleading due to smoke rings, internal temperature is the most important factor in determining true doneness. Many pitmasters wrap their ribs in foil halfway through the smoking process to prevent overcooking and maintain moisture. This wrapping technique is similar to reverse searing methods used in steak preparation, where controlled low-temperature cooking is followed by high-heat finishing. Creating a good crust requires preheating your smoker to optimal temperatures, much like how grilling requires high heat to achieve proper searing, a technique essential for developing the flavorful browning that seals in juices.
For maximizing moisture retention, rest your ribs wrapped in butcher paper for 30-45 minutes post-cook. This approach mirrors the strategy used in brisket smoking, where wrapping in butcher paper helps maintain moisture and develop a good bark. Carryover heat’ll raise temperature to your target range during this period, ensuring consistent doneness throughout. As with grilling steaks, letting meat rest after cooking allows for proper temperature stabilization and optimal texture. Set your probe alarm at 205°F for precision monitoring before serving.
Essential Preparation Steps Before Smoking
Before you fire up the smoker, proper prep work separates mediocre ribs from competition-quality results. Start by removing the membrane on the bone side with a sharp knife, then pull it off using a paper towel for traction. This step enables flavor profile enhancement by allowing seasonings to penetrate deeply. Unlike beef ribs, back ribs are the least desirable for smoking and may require different preparation approaches.
Next, trim hard fat chunks and silver skin from the meat side while preserving enough fat for moisture retention during the cook. Pat your ribs dry with paper towels—this removes excess surface moisture that prevents rub adhesion and bark formation. The dry surface also ensures that radiant heat from your smoker’s heat source will cook the meat more effectively without moisture interference. For grill and smoker maintenance, consider using wooden grill scrapers to keep your cooking surface clean between sessions while avoiding bristle debris on your food. To maintain peak performance, perform routine light cleaning after each smoking session to prevent grease and residue buildup, similar to how closing vents completely on a charcoal grill prevents oxygen-fueled fires and extends your equipment’s lifespan.
Apply a thin Dijon mustard layer as a binder, then massage your dry rub evenly across all surfaces. Allow thirty minutes for seasoning adhesion before smoking. The Maillard reaction will create the dark, flavorful exterior once smoking begins. These preparation steps establish the foundation for exceptional results.

TEXAS-STYLE BBQ RUB WITH A TWIST - This Texas BBQ-inspired rub focuses on heavy salt & pepper with next-level ingredients that will take your brisket game to the next level

Contains (1) 7.0 oz. bottle of Rib Rack All Natural Steak Spice Rub

Savory Flavor: Szeged Rib Rub Seasoning combines a well-balanced blend of spices, herbs, and smoky notes, delivering a savory and mouthwatering flavor that perfectly complements your ribs.
Spritzing Techniques to Keep Your Ribs Moist
Once your ribs develop a solid bark—typically after 2-3 hours of smoking—you’ll want to introduce moisture back into the cook to counteract the inherent drying effects of the smoking process. Premature spritzing drawbacks include mushy texture and compromised crust development, so patience during initial bark formation is critical.
You’ll apply spritz liquid every 30 minutes to two hours, depending on your preferred moisture balance. Choose from apple juice for subtle sweetness, apple cider vinegar for acidity, or water for simplicity. Custom spritz liquid flavor profiles combining vinegar, liquid aminos, and water create depth while maintaining rub integrity. Thorough spritzing around edges and trimmings ensures even coverage and consistent rehydration across all surfaces of your ribs. For optimal results, use heavy smoking wood such as oak or mesquite to complement your spritzing regimen.
Maintaining adequate grill ventilation throughout the cook allows smoke to circulate properly and prevents moisture buildup that could compromise texture. Continue spritzing until your ribs reach 203°F internal temperature, allowing you to verify the bend test for proper tenderness. This technique guarantees optimal smoke adherence, enhanced bark formation, and tender, juicy results throughout your 8-10 hour cook at 250°F.
Monitoring Your Smoker Throughout the Cook
Successful beef rib smoking hinges on consistent temperature management, and you’ll need reliable tools to track both your smoker’s ambient temperature and your meat’s internal doneness. Invest in a quality wireless thermometer like the ThermoPro TP-07, which lets you monitor temperatures from 300 feet away without opening your smoker lid. Place wired probes strategically—one measuring your cooking surface and another tracking internal meat temperature two-thirds through the cook. For overnight smoking sessions, consider investing in a temperature controller that automatically regulates your smoker temperature so you can sleep while maintaining precise heat. When selecting a wireless thermometer, prioritize models with radio-frequency technology over Bluetooth-only options for superior range and reliability through your home and yard. Top-performing options like the Thermapen ONE from ThermoWorks offer one-second readings and auto-rotating displays for quick doneness checks during your cook. Consider complementary tools like laser surface thermometers to identify hot spots on your cooking grate for optimal rib placement. For serious pitmasters seeking multi-probe setups, wireless systems with app-enabled dual-probe functionality provide enhanced monitoring across different temperature zones simultaneously. Master airflow monitoring by adjusting your intake and top vents; opening the intake increases temperature while closing it restricts airflow. Understanding the temperature, velocity, and stability of your smoker’s environment helps make critical cooking decisions that keep your cook on track. Fine-tune smoke density control through vent positioning and charcoal-to-wood ratios. This disciplined approach prevents temperature swings and secures perfectly smoked beef ribs every time.

Bluetooth Monitor Remotely: Govee Bluetooth meat thermometer lets you check the temperature of your grill, smoker, or oven from your phone. With this smart BBQ thermometer, you can multitask while grilling.
BBQOVN Smart WiFi Wireless Meat Thermometer, Sub-1G Long Range 1000FT, 7 NIST Certified Sensors in 1 Thinner Probe ±0.5℉ Accuracy, Standalone Base with App

Smart Display Base: Unlike other thermometers that require an app to function, the P2’s smart base provides direct target temperature setting and real-time readings display. For advanced features like cooking history and AI-guided cooking, the free ThermoMaven APP (iOS/Andriod) is also available, giving you the best of both worlds.
Proper Resting Methods for Maximum Tenderness
The resting period you allow after pulling your ribs from the smoker is just as critical as the cook itself—it’s where the real magic of tenderness happens. During proper resting duration of 10–20 minutes, your muscle fibers relax, reopening juice pathways while collagen converts to gelatin for enhanced tenderness. Most of the juice retained in your rested meat is bound water, held in place by capillary action rather than simply reabsorbed by the muscle fibers. Like smoking meat to the proper internal temperature, allowing adequate resting time ensures optimal results.
You’ll want to prioritize food safety considerations throughout. Keep your ribs above 140°F—never exceeding 30 minutes at room temperature. If you’re resting longer, use an empty cooler without ice, which safely holds ribs up to 4 hours. Rest on a wire rack to preserve bark, or wrap to retain juices. For enhanced juiciness, some pitmasters wrap their rested ribs in foil with moisture enhancers like butter. Many also finish their resting ribs with a medium heat searing to create a caramelized crust similar to gas grill methods. Verify temperature with a thermometer. Wrapping ribs in foil during the resting phase, much like the foil wrapping method used when smoking ribs, helps lock in moisture and heat for maximum tenderness. Using a water pan] during the resting cooler method keeps the environment moist and prevents drying out, similar to smoking techniques. Slicing unrested ribs wastes up to 30% more moisture compared to properly rested ribs, so this approach prevents the 15% weight loss you’d experience from inadequate resting, delivering maximally tender, juicy results.
Storing and Reheating Leftover Beef Ribs
How do you preserve that smoky, tender beef you’ve worked hard to achieve? Proper refrigerator storage begins within two hours of smoking. Wrap your ribs in foil with approximately 1/4 cup of water to maintain moisture and flavor for one to two weeks. For extended storage, vacuum-seal them for up to three weeks refrigerated or one year frozen. Mark the date on the bag when freezing to track storage time. Tightly wrapping your ribs in multiple layers helps minimize air exposure and prevents freezer burn during long-term storage.
When you’re ready to reheat, effective thawing procedures matter. Refrigerator thawing requires six to eight hours and preserves quality best. Alternatively, submerge sealed bags in cold water for faster results. Vacuum sealing locks in flavor and moisture while preventing the meat from drying out during storage. For even longer preservation, freezing can extend shelf life to several months when properly sealed. The smoking process itself temporarily kills surface bacteria, but proper curing significantly extends shelf life beyond what smoking alone can achieve.
Reheat vacuum-sealed ribs using a water bath at 150°F for 45 to 60 minutes, maintaining a gentle simmer to protect the seal. You’ll preserve smokiness and moisture while avoiding texture degradation from repeated heating cycles. For optimal results, allow ribs to reach near room temperature before reheating to ensure even warming throughout the meat.