You’ll master the perfect strip steak by selecting a thick-cut (2 inches) Kansas City Strip with excellent marbling around 12 ounces. Apply coarse kosher salt 30-40 minutes before cooking to dry brine. Preheat your grill to 450-500°F, establishing both direct and indirect heat zones. Sear the steak 1-2 minutes per side for crust development, then move to indirect heat. Use a meat thermometer to reach 125°F internal temperature for medium-rare, allowing 5-10 minutes rest before serving. The techniques behind timing and heat management reveal why restaurant results become consistently achievable.
Selecting the Cut
Since you’ll want consistent results on the grill, start by choosing a strip steak that’s at least 1¾ inches thick—ideally 2 inches, which gives you the thermal mass needed for a proper sear without overcooking the interior.
Look for steaks with a good marbling grade. While strip steaks are naturally leaner than ribeyes, adequate marbling guarantees juicy, robust flavors during grilling. Kansas City Strip Steaks excel here, offering impressive marbling balanced with the cut’s characteristic tenderness. The beefy flavor and grilling performance of Kansas City Strip Steaks make them a top choice for home cooks seeking restaurant-quality results.
Check that your steak weighs around 12 ounces for a 2-inch cut. This weight-to-thickness ratio confirms even cooking across the entire surface. The ideal thickness prevents the exterior from charring before the center reaches your target doneness, making thicker cuts superior for achieving restaurant-quality results at home. A probe thermometer helps you monitor internal temperature to ensure perfect doneness throughout the cooking process. For the most accurate readings, consider an instant-read thermometer with ±0.5°F accuracy and 1-second response time to check doneness without losing precious heat. Before grilling, let your steak come to room temperature for more even cooking and better results on the grill. A quality grill with even heat distribution ensures you won’t encounter hot or cold zones that can lead to inconsistent searing. Look for models with cast iron grates that retain heat exceptionally well for creating the perfect steak crust. If you’re considering a pellet grill for your steaks, options like the Traeger Grills Pro 22 offer consistent temperature control within +/-15°F for reliable results.
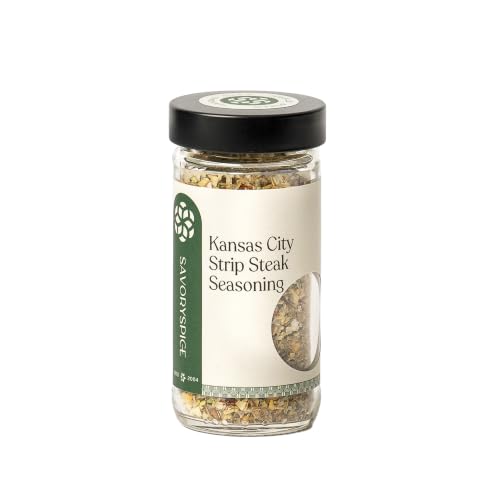
SWEET, SALTY AND BALANCED: A salt-and-pepper-forward steak seasoning that is aromatic and sweet-spiced, with earthy, citrus and herbal notes.

EXQUISITE SAMPLER SELECTION: Treat yourself to a delightful culinary experience with our Sampler pack, featuring 2 butter-tender Super Filet Mignon, 5 oz each and 2 hearty, rich Kansas City Strip Steak, 10 oz each - the perfect introduction to premium cuts.

EXPERIENCE UNMATCHED FLAVOR: Transform ordinary meals into extraordinary culinary delights with our deluxe steak seasoning blend, meticulously crafted for premium steaks, roasts, and burgers.
Seasoning and Pre-Cook Prep
Now that you’ve selected the perfect cut, proper seasoning and preparation will reveal its full potential on the grill. Start by patting your steak dry, then apply coarse kosher salt generously on all sides. Let it rest for 30-40 minutes—this dry brining process draws out moisture while deepening flavor and creating a caramelized crust. Add freshly cracked black pepper just before cooking.
Remove your steak from the refrigerator 30-40 minutes ahead to reach room temperature, ensuring even cooking. Rub lightly with high smoke-point oil for better seasoning adhesion. Choose oils like refined avocado oil, canola, or grapeseed, which have elevated smoke points that won’t break down under high grilling temperatures. A meat thermometer will help you verify your steak reaches the exact internal temperature you desire for your preferred doneness level. Freshly ground pepper delivers a more vibrant, complex flavor than pre-ground varieties, making it worth the extra effort.
For enhanced complexity, prepare compound butter application by combining salted butter with minced garlic, Worcestershire sauce, and thyme. Dollop this onto your steak immediately after grilling, allowing it to melt into every crevice and elevate your final result. While some grillers use 400°F, achieving the best results requires preheating your grill to 450°F to 500°F for optimal sear and flavor development. If you’re using a gas grill, models like the Weber Genesis SX-335s offer even heat distribution that helps maintain consistent temperatures across the cooking surface. Plan to sear your steak on high heat for 1–2 minutes per side to develop a flavorful crust before moving to indirect heat. This searing process triggers the Maillard reaction, creating the deeply browned, savory surface that makes grilled steak so irresistible.
Grill Setup and Heat Management
Temperature control is everything when you’re searing strip steak—it’s the difference between a restaurant-quality crust and an unevenly cooked disappointment. You’ll preheat your grill to 450°F or higher, setting all burners to high for 15 minutes on gas, or lighting a full charcoal chimney until coals ash over at 500–550°F.
Clean and oil your grates after preheating—grease maintenance prevents sticking. Establish two zones: direct heat for your initial sear and indirect heat for gentle finishing. Position coals in a tight pile on one side of charcoal grills, or turn off half your burners on gas models. For thicker steaks over 1.5 inches, two-zone cooking ensures even temperature distribution throughout the meat. Use an instant-read thermometer to monitor the internal temperature and remove the steaks when they reach your desired level of doneness.
This fire control setup lets you sear aggressively without overcooking the interior, moving your steak between zones as needed for perfect doneness. On charcoal grills, keep the bottom vents fully open for consistent airflow and adjust the top damper to maintain your target temperature range. If you need to lower the temperature after searing, you can reduce burners to achieve medium heat at 325 to 375°F for more controlled cooking. When grilling, use high-smoke-point oils like grapeseed or avocado oil to prevent burning at high temperatures. Carryover heat will continue to raise the internal temperature by a few degrees even after the steak is removed from the grill. After reaching the target temperature, allow the steak to rest for 5-10 minutes so the juices can redistribute throughout the meat.
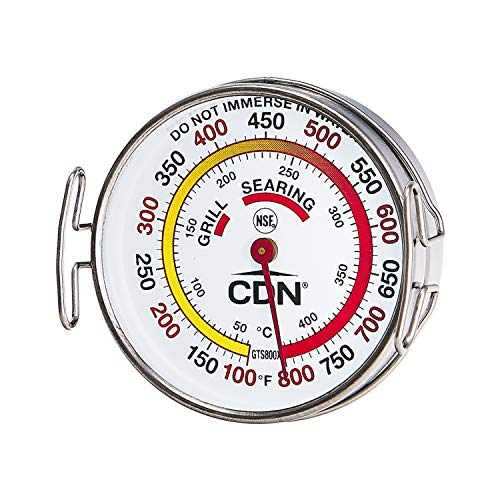
ACCURATE TEMPERATURE ZONES. The CDN GTS800X Grill Surface Thermometer features a color-coded scale that allows precise monitoring of temperature zones, providing optimal control over your grilling experience.

Material:This Grill Temperature Gauge is made of stainless steel to maximum durability and reliability.That is not only safe but also environmentally friendly
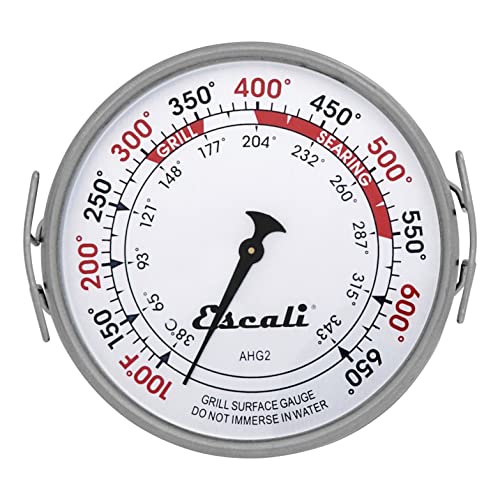
Temperature Range: 100° to 650°F / 38° to 343°C. Dial Diameter: 3.5 inches
Searing and Cooking Techniques
With your grill properly configured and zones established, you’re ready to execute the sear that’ll define your steak’s crust. You’ll choose between three sear approaches: direct searing for maximum crust development, the sear and move method for controlled cooking, or reverse searing for edge-to-edge doneness.
For direct searing, place your strip steak over the hottest coals or burners. Sear timing demands 1-2 minutes per side, flipping every 2 minutes until you’ve achieved a deep brown crust in about 8 minutes total. Rotate 90 degrees on your second flip for diamond grill marks. For optimal results, sear steaks 1 minute per side, twice over full heat to develop that restaurant-quality crust.
The sear and move method follows similar sear timing but relocates your steak to indirect heat after browning. After searing both sides, turn about 1 minute prior to halfway point through the remaining cooking duration. Reverse searing begins indirectly at 110-115°F internal temperature, then finishes with a quick 1-2 minute sear per side over direct heat. Before placing your steak on the grill, ensure you’ve brought it to room temperature for even cooking. Using an instant-read thermometer is advised for precision when checking your steak’s internal temperature. Once your steak reaches the desired doneness, allow it to rest for 5 to 10 minutes to retain juices before serving. Throughout the grilling process, use high-heat-resistant utensils to safely handle your steak and prevent burns. Before grilling, pat the steak dry and season generously with oil and your preferred rub to enhance flavor and crust formation.

Large Display: Features a 2 3/8 inches large face for clear visibility; Stem length of 2 7/8 inches enhances accessibility; Enables easy classification of food temperatures in various cooking environments

【500FT Remote Temperature Monitor & Smart Alerts】Equipped with Bluetooth 5.0, this bluetooth grill thermometer transmits real-time grill temperature data to the TempPro App within 500 feet; customize high/low temperature thresholds, and instant alerts will be pushed to your smart phone once the temperature deviates from your preset range, saving you from constantly hovering beside the grill
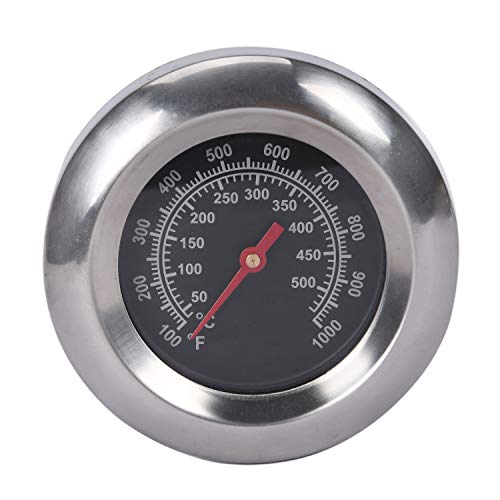
Wide temperature range: 100 F-1000 F/ 50 ℃- 500 ℃(Accurate Readings). Dimensions: 3" face, 2" stem, M10 nut (0.39" strew), Please check the dimensions of your grill before you order
Internal Temperature and Doneness Control
Once you’ve achieved that perfect crust, pulling your steak at the right moment determines whether you’ll deliver a rare, buttery center or a well-done, fully cooked interior. Use an instant-read thermometer to monitor internal temperature precisely. For medium-rare strip steak, pull at 130-135°F final temperature, accounting for carryover cooking during resting.
Different doneness levels require distinct pulls: rare at 110°F, medium at 130°F, and medium-well at 150°F. This strategic underpulling allows residual heat to finish cooking while preserving meat moisture and crust formation. Whether you’re grilling American Wagyu, USDA Prime, or dry-aged beef, the New York Strip responds beautifully to this precision temperature approach.
A 5-minute rest post-grill is critical. Temperature rises approximately 5°F during this period while meat fibers relax, redistributing juices throughout. Insert the thermometer in the thickest part of the steak to get the most accurate reading and avoid undercooking or overcooking. Regular temperature checks do not result in juice loss, so continue monitoring your steak even after it leaves the grill. For outdoor cooks managing multiple steaks or longer sessions, wireless grill thermometers with Bluetooth or radio-frequency connectivity let you monitor doneness from anywhere in your yard without hovering over the grill. Top-rated options like the Thermapen ONE deliver one-second readings with auto-rotating backlit displays, making it easy to catch that exact moment of doneness. For those seeking alternatives, the Fireboard Pulse excelled in ambient temperature accuracy and high-heat tolerance up to 1000°F, making it ideal for searing applications. If you prefer the reverse-sear technique, monitor internal temperature as the steak cooks at lower heat first, then finish with a high-temperature sear to develop a flavorful crust. This technique maintains optimal moisture retention and guarantees your strip steak reaches the desired doneness consistently.
Finishing and Serving
After your strip steak’s resting period concludes, you’re ready to transform it into a restaurant-quality presentation. You’ll decide between serving whole or sliced based on your audience and occasion. For adults, serving whole preserves heat and juices ideally. For children or photo opportunities, slicing offers elegance and practicality.
When slicing, work at the last second to minimize evaporation and cooling. Dredge your slices in board sauce—a mixture of olive oil, kosher salt, pepper, melted butter, and fresh herbs—before plating. Slicing at the last moment helps retain heat and moisture for optimal flavor. Finish your plated steak with a rosemary sprig as a garnish to elevate the visual appeal. For enhanced richness, consider basting with butter during the final moments of cooking or drizzling over the finished steak.
Consider your plating shapes and height carefully. Stack boneless cuts for elevation, or fan slices across your plate for restaurant-style presentation. Keep slices together post-cutting to maintain visual impact. Position your steak on unique serving vessels like cutting boards for sophisticated presentation that impresses every time. Slicing thinly across the grain ensures maximum tenderness with each bite. Just as with grilled meats, resting the steak allows juices to redistribute throughout for better flavor and texture. If you need to prepare ahead, remove the steak from refrigeration to reach room temperature before final serving to ensure even warming. The dish is versatile and suitable served warm or at room temperature depending on your preference and dining setting.