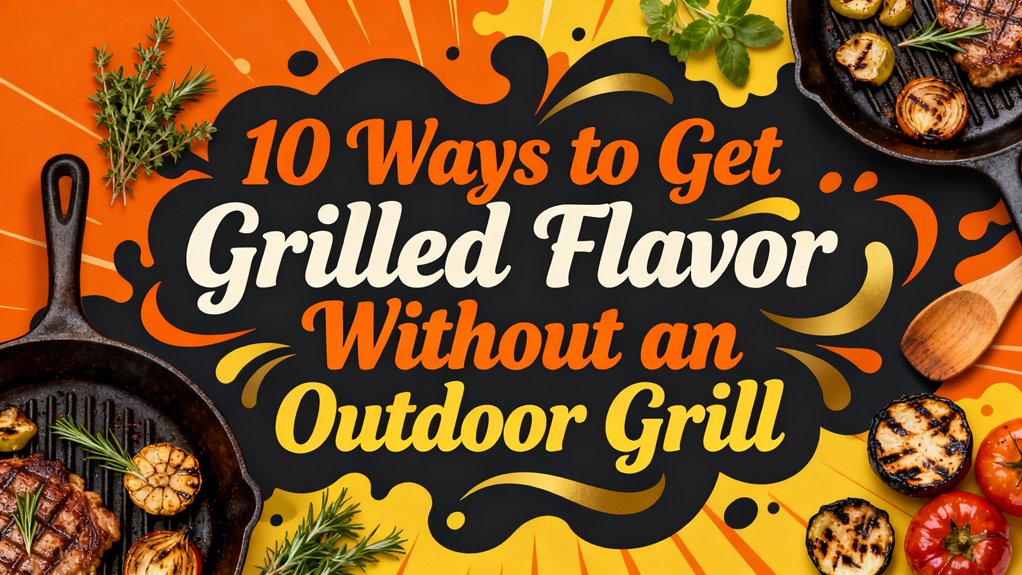
You’ll master indoor grilling by leveraging cast-iron skillets preheated to high temperatures for superior heat retention and searing. Apply dry rubs with smoked paprika and chipotle powder at least 30 minutes prior. Use the rotation method to create authentic grill marks, then finish proteins in your oven for ideal texture. Harness your gas stovetop’s open flame for charring, and strategically apply liquid smoke for depth. These techniques combine conduction, radiation, and seasoning to replicate outdoor grilling’s smoky, caramelized results—explore each method’s nuances for transforming your indoor cooking.
Master the Cast-Iron Skillet for High-Heat Searing
You’ll want to start by removing your steak from the refrigerator 15 minutes before searing—this allows the meat to reach closer to room temperature, promoting more even cooking throughout. Pat it dry with paper towels and season generously with salt and pepper.
Preheat your cast-iron skillet over medium-high heat for 5-6 minutes. Test readiness by splashing water; it should sizzle and vanish immediately. Add a thin layer of high smoke-point oil like canola or avocado, heating until shimmering. Using garlic powder as an additional seasoning enhances the depth of flavor in your seared steak. Cast iron skillets retain heat exceptionally well, ensuring consistent temperature throughout the cooking process. Lodge’s pre-seasoned cast iron grill pans are renowned for their even heating capabilities, making them ideal for achieving restaurant-quality results at home. Cast-iron grates are also prized for their searing ability and durability across both indoor and outdoor cooking applications. For those seeking premium performance, luxury gas models like Firemagic Echelon offer advanced features for high-end outdoor cooking.
Place your seasoned steak in the hot skillet and sear 2 minutes per side, maintaining high heat for the Maillard reaction. Utilize a two-burner method by adjusting skillet angle to distribute heat evenly. Flip every 1-2 minutes for uniform browning. For optimal results, consider finishing your steak in the oven after searing to achieve ideal doneness and enhance overall flavor development. After cooking, allow the steak to rest for several minutes to redistribute juices and enhance tenderness. Remove the steak 5°F below target doneness and rest it under foil for 5-10 minutes.

Mild and Easy: Grapeseed Oil is at its best in stir-fries and sautés; it doesn't overwhelm other ingredients and lets fresh flavors shine. When grilling or frying, it is a must-have in the pantry.

Light Buttery Flavor That Elevates Every Meal: Algae Cooking Club Chef-Grade Algae Oil enhances every dish with subtle richness. Its neutral profile makes it ideal for searing, baking, and dressings, transforming everyday meals into gourmet experiences.
Create Grill Marks Using the Rotation Method
Now that you’ve mastered the high-heat searing technique, you can elevate your presentation by creating authentic grill marks on your cast-iron skillet. Position your protein at a 45-degree angle, aligning ends at 10:00 and 4:00 positions. Sear for 2 minutes until golden-brown marks form. Lift straight up, then rotate 120 degrees for a second 2-minute sear, creating an intersecting pattern. You’ll develop alternate sear patterns—diamond, crosshatch, or square—depending on your rotation angle. Precise timing control guarantees defined lines without overcooking. Flip and repeat on the opposite side. This rotation method produces professional grill marks on steak, chicken, or vegetables while intensifying flavor through localized Maillard reactions, achieving outdoor grilling results indoors. These browning reactions require proper heat management to achieve the desired color and depth of flavor. Grill marks can also be successfully applied to non-meat items like grilled eggplant, bread, peaches, and pineapple for enhanced visual appeal. For bread specifically, you can achieve crispy, golden results by using oven-baked techniques to create the perfect texture. Similar to the traditional charcoal method, resting your protein after searing allows juices to redistribute for a more tender result. Using a meat thermometer ensures your burgers and other proteins reach safe internal temperatures while maintaining optimal juiciness.
Harness Your Gas Stovetop Open Flame
Because gas flames deliver heat directly to your cookware without waiting for heating elements to warm up, they’re perfect for achieving grilled results indoors. You can reach temperatures between 500 and 700 degrees Fahrenheit, enabling rapid caramelization and char development.
Position your pan directly over the flame to harness conduction and radiation heating simultaneously. This combination creates sear marks while cooking interiors thoroughly. For enhanced flavor, try direct flame basting using infused oils—drizzle herb-infused or garlic-infused oils onto food as it cooks, allowing the flames to slightly ignite the surface and develop complex aromatic compounds. Like grilling vegetables and proteins on an outdoor grill, you can achieve the same charred exterior and smoky depth indoors. The Maillard Reaction occurring at these high temperatures transforms proteins and sugars into savory, meaty flavors that define grilled food.
Adjust flame height in real-time to control browning intensity. Practice finding your prime simmer setting, as flames require precision to avoid extinguishing. Similar to how outdoor grills use vent adjustments to regulate airflow and heat output, stovetop flame control replicates outdoor grilling’s heat variability and flavor complexity indoors. For the most reliable results, use a meat thermometer to verify doneness rather than relying solely on cooking time. For those seeking more advanced temperature precision and smoke control capabilities, WiFi-enabled controllers found on premium outdoor models can provide automated monitoring, though stovetop methods offer immediate manual adjustment. If you prefer a more consistent, smoke-minimized approach indoors, smokeless electric grills deliver caramelized flavor without the learning curve of open flame cooking.

Nonstick & Easy to Clean: The Switzerland ILAG nonstick coating is very effective in preventing anything from sticking to the surface, even with minimal oil, and also makes cleaning a breeze, just wipe it with a paper towel or rinse it with water. Free of PFOA and PFOS.

Enameled Cast Iron delivers superior heat distribution and retention; Nests with other Alpine Outdoor Collection products for enhanced storage

Steakhouse Sear At Home: The Lodge Square Cast Iron Grill Pan delivers high-heat searing and bold grill marks while channeling excess grease away
Develop Smoky Flavor With Dry Rubs and Marinades
While gas stovetop flames deliver immediate heat, dry rubs and marinades build the smoky complexity that indoor cooking can’t achieve through heat alone. You’ll layer smoke with smoked spices by combining smoked paprika, cumin, and chipotle powder as your aromatic foundation. Add garlic and onion powder for savory depth, then incorporate cayenne or black pepper for dimensional heat rather than flat spiciness.
Apply your rub at least 30 minutes before cooking to allow flavors penetrating the meat surface. You can infuse meats with smoke from stovetop by using cast iron or heavy-bottomed pans that retain heat intensely. For enhanced smoky depth similar to outdoor barbecue, consider incorporating hickory wood chips into your indoor smoking methods. While hardwoods like post oak and red oak are traditionally favored for their balanced smoke flavor that enhances beef and pork without overpowering the meat, hickory offers a robust alternative for indoor cooking. Fruit woods such as apple and cherry provide lighter, sweeter smoke options for those preferring subtle flavor profiles. Pairing wood chips to meats—such as hickory for beef—ensures the smoke complements your protein’s natural flavors. Opt for kiln-dried, MDA-certified hickory to ensure your wood is free from contaminants that could compromise your dish’s flavor profile. This versatile rub contains 0 net carbs per serving, making it ideal for keto-friendly grilled dishes. Store finished rubs in airtight containers for months, enabling batch preparation. This approach transforms indoor cooking into sophisticated barbecue experiences.
Use Smoked Paprika and Chipotle for Depth
To build authentic smoky depth that rivals outdoor grilling, you’ll want to understand how smoked paprika and chipotle powder work differently in your rubs. Smoked paprika delivers complex sweetness and earthiness at mild heat levels—up to 500 SHU—making it ideal for delicate proteins. Chipotle powder intensifies the experience, ranging from 2,500 to 8,000 SHU with pronounced smoke and earthy depth from guaiacol compounds and tannins.
Create smoke-infused spice blends by combining both powders strategically. Use smoked paprika as your base, then layer chipotle for heat and intensity. Chipotle powder made from smoked and dried jalapeños gives it a distinctly Mexican character that pairs exceptionally well with beef and pork. Smoked paprika is also commonly used in barbecue rubs for meats, which makes it another excellent choice for building that authentic grilled flavor. For pellet grill enthusiasts, using oak pellets for smoking provides a traditional wood smoke foundation that complements these spice blends beautifully. For deeper complexity, consider soaking wood chips like cherry to infuse your indoor cooking with the layered smoke characteristics found in traditional smoking methods. When selecting wood chips, remember that hardwoods and fruitwoods like cherry, apple, and maple produce mild, sweet smoke ideal for indoor cooking applications. Premium charcoal options like binchotan charcoal offer minimal smoke production that can inspire cleaner flavor profiles in your spice blend development. Top brands such as Lumberjack and Bear Mountain BBQ offer affordable, high-quality hardwood pellets without fillers that enhance both your spice rubs and smoking techniques. You can also explore chimichurri sauces incorporating these smoked spices to enhance beef, pork, or chicken marinades indoors, effectively replicating that authentic grill-char essence without outdoor equipment.
Broil Your Meats Close to the Element
Once you’ve seasoned your proteins with smoke-infused spice blends, your broiler becomes the tool that transforms those flavors into a grill-like crust. Proper broiler rack positioning determines browning success. Position your rack 3-4 inches from the heating element for cuts under 1.5 inches thick, allowing rapid, even caramelization. For thicker or bone-in meats, increase distance to 4-5 inches to prevent exterior burning before centers cook through.
Consistent broiler temperature monitoring guarantees ideal results since broilers vary significantly between models. Preheat your broiler and pan for 5-7 minutes at 400-550 degrees Fahrenheit. Bring meat to near room temperature before broiling to promote uniform cooking. Flip once the first side browns, using tongs for meats. Lining the pan with aluminum foil will help catch drippings and make cleanup easier. Rest finished proteins for 5-10 minutes under a foil tent to retain juices and lock in that coveted grilled texture. However, be cautious about using foil to line your entire broiler pan, as excessive foil coverage can restrict airflow and heat distribution. Just as outdoor grills require well-ventilated outdoor space to operate safely, your indoor broiler also needs proper ventilation to function effectively. For outdoor grilling surfaces, consider using a heat-resistant grill mat to protect your deck from grease splatters and heat damage. If you don’t have access to an outdoor grill due to inclement weather, broiling indoors offers a practical alternative to grilling in the rain. Like grilled baked potatoes that require indirect heat initially to soften before finishing over direct heat for a crispy exterior, broiled proteins also benefit from careful temperature management throughout the cooking process.
Pan-Sear Then Finish in the Oven
Since your broiler method activates smoke-infused flavors, pan-searing followed by oven finishing creates an equally impressive grilled crust through a different mechanism: the Maillard reaction. You’ll pat your meat dry, then sear it in a high-heat oil like avocado or beef tallow until a golden crust forms—typically 3-4 minutes undisturbed. That loud sizzle confirms adequate pan temperature. After deglazing your pan and employing fat rendering techniques through butter basting at medium-low heat, transfer your ovenproof skillet to a 400-degree oven. A cast iron skillet is ideal for this method as it naturally retains heat well and provides an even sear. For the best results, consider using a pre-seasoned cast iron grill pan which builds natural non-stick seasoning over time while delivering superior heat retention. Cast iron outperforms stainless steel in searing and versatility due to its superior heat retention and even distribution across the cooking surface. When selecting your cookware, choose a pan with adequate ridge height to create authentic grill marks and maximize contact with your protein. This two-stage approach prevents overcooked gray edges while maintaining precise internal doneness. For thicker cuts of at least 1 1/2 inches thick, the reverse sear method provides superior results by cooking gently in the oven first before the final pan sear. Like traditional grilling, marinate your meat for 4 to 24 hours in a flavorful mixture with olive oil, vinegar, and garlic to tenderize and infuse deeper flavor. Finally, rest your meat for 5-10 minutes, allowing moisture redistribution and flavor development. Ensure your grill pan is compatible with your electric stovetop, as smooth-top ranges require careful use to avoid surface damage. You’ve achieved restaurant-quality results without stepping outside.

Double Burner Configuration: The Lodge Double Play Reversible Cast Iron Grill/Griddle covers two burners, offering a generous breakfast grill plate for family breakfasts or meal prep with ease

【SAFE-TO-USE COOKWARE】Crafted with pure iron and oil, just as traditional seasoned cast iron should be — our cookware is free of harmful PFOA and PTFE. We’re dedicated to creating products that keep you and your loved ones safe: every stage of our manufacturing process prioritizes the well-being of our employees and our customers.

Cast Iron Grill Pan: This 11-inch square grill pan, a part of Lodge's Chef Collection, is a durable cast iron pan ready to help you experiment in the kitchen like a pro
Apply Liquid Smoke Strategically for Maximum Impact
While liquid smoke can’t replicate the complexity of traditional wood-smoking, you’ll find it delivers impressive results through strategic application. You control the intensity precisely through concentrated dosage control, adjusting smoke flavor to your preference without guesswork. Start conservatively—liquid smoke’s potency means you can always add more, but you can’t remove excess.
You’ll appreciate the versatile application formats available. Mix it directly into marinades for deep penetration, brush it onto meat surfaces before searing, or incorporate it into pan liquids during cooking. This flexibility lets you customize flavor distribution across your dish. Liquid smoke’s antimicrobial action also helps preserve your prepared dishes while enhancing their smoky taste. The clean-label preference among modern consumers makes liquid smoke an increasingly popular choice for home cooks seeking natural flavoring alternatives. For ideal results, apply liquid smoke before heat exposure; the cooking process then integrates the smoky notes into your protein, delivering authentic grilled characteristics without requiring outdoor equipment or extended preparation time. Just as George Foreman grills require cleaning after each use to maintain optimal performance, your cookware and utensils used with liquid smoke should be properly maintained for food safety and longevity. For surfaces and equipment used in food preparation, maintaining cleanliness is essential, similar to how stainless steel grill cleaners keep outdoor cooking surfaces hygienic and functional. While both grilling and smoking can form carcinogenic compounds like PAHs and HCAs when exposed to high heat or smoke, using liquid smoke at lower temperatures during indoor cooking may help reduce the formation of these potentially harmful substances. Unlike outdoor grills where rust buildup can compromise food safety and taste with metallic off-flavors, indoor cooking with liquid smoke eliminates these concerns entirely. Proper refrigeration and hygienic handling of smoked preparations ensure food safety while maintaining the quality of your finished dishes.
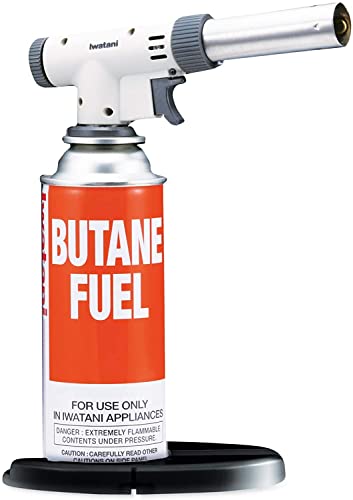
Torch Your Vegetables for Restaurant-Quality Char
A kitchen torch transforms your vegetable prep by delivering the intense, direct heat needed for restaurant-quality charring without an outdoor grill. You’ll position vegetables like bell peppers or eggplant directly over your stovetop burner while simultaneously torching the opposite side. This butane-powered versatility reaches temperatures that create the black crust essential for caramelization.
Maintain direct contact with the heat source without frequent movement—this uninterrupted exposure develops ideal char. For flavor development considerations, season produce with kosher salt and olive oil beforehand. The combination of direct flame and torch creates smoky, meaty notes while building textural contrast between charred exteriors and tender interiors. Like grilled onions, charred vegetables benefit from being turned frequently to ensure even caramelization without burning. To prevent sogginess and enhance texture, consider salting and draining vegetables like eggplant before charring. Garnishing your charred vegetables with fresh herbs or lemon juice adds brightness and complexity to the final dish. For optimal results, aim for your vegetables to reach a bright green and tender stage before adding char, similar to the stovetop pan-grilling method. Charred vegetables can be used in salsa, romesco sauce, and pimento cheese for subsequent culinary applications. For an alternative approach, you can seal your charred vegetables in foil packets and finish them on the grill to retain their moisture and flavor. You’ll achieve results in approximately six minutes using a hot cast iron pan, rivaling traditional grilling outcomes.

Safe and Sturdy Creme Brulee Torch: The safety lock could prevent accidental ignition. Also the ergonomic design provides comfort to your hand and keep away from the flame; the aluminum alloy material adopted makes it more resistant and sturdy, ensuring the longevity (Note: After each use, please turn the flame adjustment valve to the lowest level(OFF Position), and engaging the safety lock for indicent ignition)
Iwatani top quality butane torch is backed by a 1-year manufacturer (butane not included)

Combine Multiple Techniques for Authentic Grilled Results
To achieve grilled results that rival outdoor cooking, you’ll need to layer multiple techniques that address what indoor methods lack individually. Start by combining hot charcoal with electric grills to maximize searing capability while maintaining temperature control. Sear proteins on high heat for sharp crusts, then shift to indirect zones with wood chips at 225°F for smoke penetration. Apply coarse rubs featuring smoked paprika and flake salt before cooking to develop authentic bark texture. Incorporate ambient countertop smoke generators alongside marinades to infuse deep wood-infused flavors. Electric grills offer consistent heat distribution that allows you to maintain precise temperatures throughout the cooking process. Models like the Blackstone E-Series Electric Griddle provide dual temperature zones and LCD displays for exact heat management. When selecting an electric griddle, consider surface material and nonstick coatings to ensure even heating and easy cleanup. For maximum versatility, choose griddles with large flat-top surfaces that allow you to cook multiple foods simultaneously. Top-performing outdoor models such as the Solo Stove Steelfire demonstrate how professional-grade griddles achieve superior cooking evenness and capacity for serious outdoor cooking enthusiasts. Unlike traditional smoking which requires maintaining low steady temperatures for hours to break down connective tissues properly, indoor methods can accelerate the process. For those seeking premium outdoor alternatives, consider investing in quality gas grill models with wind-resistant features and rotisserie capabilities for enhanced outdoor cooking performance. This sequencing—marination, preheating, direct searing, and indirect smoking—creates layered complexity matching traditional BBQ. The combination compensates for each method’s limitations, delivering melt-in-mouth tenderness with restaurant-quality char indistinguishable from outdoor results.

DUAL FUEL 3-IN-1 ELECTRIC, GRIDDLE + CHARCOAL: Powered by the dynamic Electric2Coal cooking system, this outdoor electric grill can seamlessly transform into an outdoor charcoal grill for those days when you’re craving that extra smoky flavor. BONUS: Add wood chunks to the charcoal rack to get even more smoke flavor!

Gas & Charcoal Combo: The dual-fuel grill with an attached offset smoker and a side burner provides the authentic charcoal flavor, the convenience of gas grilling, the rich smoky flavor and the versatility of cooking sides or sauces, all in one tidy package

823 Square Inches: Includes 475 sq. in. porcelain-enameled steel wire cooking grates, 151 sq. in. chrome-plated warming rack and 197 sq. in. offset smoker