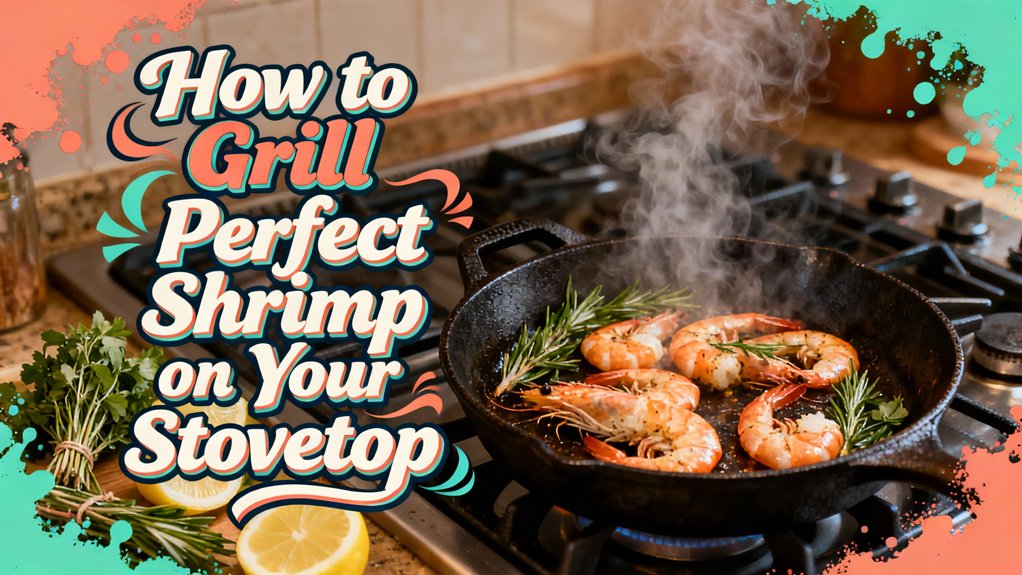
You’ll achieve perfectly seared stovetop shrimp by selecting jumbo peel-on raw shrimp and patting them bone-dry before seasoning. Heat your cast-iron skillet over medium-high heat, then sear shrimp two minutes per side without moving them. Watch for the color shift from translucent gray to opaque white with pink accents, and verify internal temperature reaches 120°F to 130°F. Remove immediately to prevent overcooking. The details that separate mediocre shrimp from restaurant-quality results lie in mastering your equipment and timing.
Preparation and Equipment Setup
Before you heat up your skillet, you’ll need to gather your essentials and prep your shrimp properly. Start by choosing the right grill—a cast-iron skillet or stainless steel pan works best for stovetop cooking, offering superior heat retention and even browning. Pat your shrimp completely dry with paper towels; moisture prevents proper searing. Devein and peel them if desired, leaving tails intact for easier handling.
Arrange your cooking surface by preheating it over medium-high heat for two to three minutes. This guarantees optimal searing temperature. Season your shrimp with salt, pepper, and any preferred spices beforehand. Have your cooking fat—butter or olive oil—measured and ready. Keep a nearby plate for finished shrimp and confirm adequate ventilation since high-heat cooking produces steam. Cast iron requires regular seasoning and rust prevention to maintain its nonstick properties and longevity, so ensure your pan is properly maintained before cooking. While planning your meal, consider preparing complementary side dishes like potato salad or grilled vegetables to round out your grilled shrimp dinner. Organization prevents overcrowding and ensures even cooking throughout your batch. For best results, use larger shrimp typically sized at 26 to 30 per pound, as they’re less likely to overcook and provide a meatier texture on the stovetop. Cast iron’s legendary heat retention makes it particularly effective for maintaining consistent high temperatures needed for perfect searing. If you’re looking for excellent grill marks on your seafood, a pre-seasoned cast iron grill pan provides tall ridges that create defined searing patterns while the seasoned surface allows for easy food release. Check that your grill pan has adequate ridge height to lift food above rendered fats and create authentic char marks on your shrimp.

MULTI-FUNCTION: Our versatile shrimp pan is perfect for the grill, stove or oven and is even a great way to serve your dish.

Pre-Seasoned Cast Iron Ready from Day One – The factory pre-seasoning provides an immediate nonstick-like surface that improves with every cook, so you can use this pan on day one without any initial seasoning ritual

Sear 22 Jumbo Shrimp: With 22 dedicated slots, this cast iron shrimp pan ensures every shrimp is evenly cooked, locking in flavor and moisture for restaurant-quality results.
Selecting the Right Shrimp
Choosing the right shrimp size dramatically impacts your stovetop grilling results, since larger varieties withstand high heat without overcooking while smaller ones turn rubbery in minutes. You’ll want jumbo shrimp (16/20 per pound) or colossal varieties (8/12 per pound) for ideal texture and moisture retention.
Check shrimp grading carefully across suppliers to guarantee consistent sizing. Select peel-on, deveined raw shrimp rather than pre-cooked options—the shells protect delicate flesh during high-heat stovetop grilling. Premium varieties like Argentinian Red or Alistado Red offer superior flavor and firm texture that absorbs heat evenly. Alistado Red Shrimp, another premium Mediterranean option, boasts an intense umami flavor and buttery texture that elevates your grilled dish.
Fresh versus frozen matters less than thawing technique; thaw frozen shrimp overnight in refrigeration. For quick stovetop preparations, small shrimp require fast searing to prevent toughness and ensure optimal results. Pat the shrimp dry before seasoning to ensure proper grill marks and optimal browning on your stovetop surface. Drying the shrimp thoroughly also helps prevent sticking during the high-heat cooking process. Verify your shrimp’s source and freshness indicators—pristine waters produce exceptional taste that justifies premium pricing for your main course preparation. If you prefer outdoor cooking, consider investing in a portable flat top grill that provides even heat distribution across a larger cooking surface for seafood preparations. Quality grilling accessories like stainless steel tongs with superior grip help you handle delicate shrimp without damaging the flesh during high-heat cooking. When grilling outdoors on your deck, protect the surface with a heat-resistant mat that extends beyond your grill’s footprint to catch grease and seafood drippings.
Creating Your Seasoning Marinade
Creating Your Seasoning Marinade
A balanced marinade transforms your jumbo shrimp into a flavorful main course, and you’ll build it from four foundational components: a fat base, acid, seasonings, and aromatics.
Start with ¼ to ½ cup olive oil as your fat foundation. Add 2-3 tablespoons fresh-squeezed lemon or lime juice for acidity that tenderizes the shrimp. Incorporate 2-3 minced garlic cloves, ½ teaspoon kosher salt, and ¼ teaspoon cracked black pepper.
For customizing marinade flavors, layer 1 teaspoon dried oregano, ½-1 teaspoon paprika, and 1 tablespoon fresh parsley. These complementary ingredient combinations create depth without overpowering. If you prefer a simpler approach, you can use 3 teaspoons of favorite seasoning instead of individual spices. For an added layer of complexity, consider incorporating a small amount of wood smoke using alder wood chunks, which pairs exceptionally well with seafood. Apple or cherry wood also works beautifully with shrimp and other delicate proteins, offering mild, sweet notes that won’t overpower the seafood.
Whisk everything together in a bowl or ziplock bag, ensuring even distribution. Coat your shrimp thoroughly, then refrigerate for flavor melding. Reserve 2 tablespoons for glazing before cooking. When you’re ready to cook, consider switching to a high-smoke-point oil like refined avocado or grapeseed oil for the actual stovetop grilling to prevent burning. Aim for thin blue smoke rather than thick white smoke if using wood chips in a stovetop smoker to achieve clean combustion and prevent harsh flavors. Let the shrimp marinate in the refrigerator for 1-3 hours to allow the marinade ingredients to fully penetrate the meat and develop maximum flavor. While hickory delivers a bold flavor perfect for red meats and pork, its intensity can overpower delicate seafood, so stick with milder woods or use kiln-dried, MDA-certified hickory sparingly if you want a stronger smoke profile.
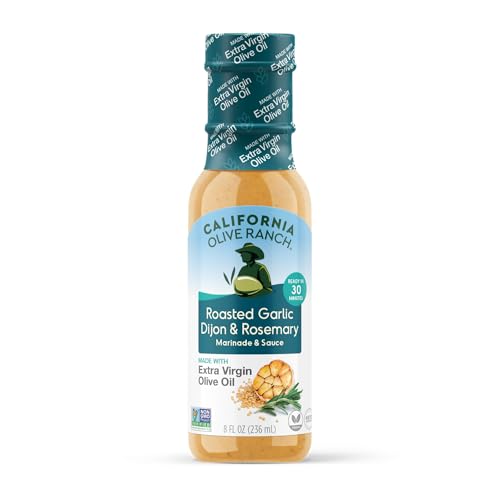
DISCOVER THE TASTE OF THE MEDITERRANEAN: with our delicious Extra Virgin Olive Oil-based marinade and sauce.
ROASTED GARLIC INFUSION: Cold pressed extra virgin olive oil blended with natural roasted garlic essence for a rich, mellow flavor that enhances everyday cooking.

The truff in TRUFF. From our game changing hot sauces, bold pasta sauces to our flavorful mayos, we’ve never truly let the truffle shine on its own… until now. After years of exploring the unique flavor and aroma of black winter truffles, we’re finally putting them front and center in our Truffle Oil.
Marinating and Temperature Management
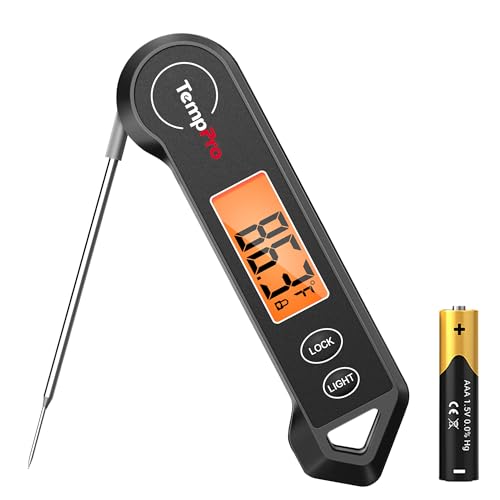
Once you’ve whisked together your marinade, you’ll want to coat your shrimp thoroughly and refrigerate them to allow the flavors to meld—typically 30 minutes to 2 hours depending on your preference for intensity. Before cooking, remove your shrimp from the refrigerator and pat them completely dry; excess moisture inhibits proper searing and complicates temperature monitoring methods. Shrimp size selection matters greatly—standard medium shrimp require consistent 2–3 minutes per side over direct heat. Position your instant-read meat thermometer into the thickest portion of each piece to verify internal temperature reaches 130–135°F for prime juiciness. This precise temperature monitoring guarantees your shrimp achieves that ideal firm-yet-tender consistency without developing rubbery texture, delivering both safety and culinary excellence. Using a kitchen thermometer is the most reliable method to confirm your shrimp have reached the perfect internal temperature. For accurate readings in just seconds, consider upgrading to a ThermoWorks Thermapen ONE which delivers ±0.5°F precision with 1-second read times. Keep acid-based marinades limited to 30 minutes to prevent the shrimp from becoming mushy and losing their desirable firm texture. For those who enjoy grilling multiple proteins simultaneously, a 2-in-1 electric hot pot with grill offers dual adjustable temperature zones that allow you to monitor and control heat precisely for different seafood items.

2.0 inches large auto-rotating backlit display: Digital food thermometer has a 180° auto-rotating backlit display, making this kitchen thermometer perfect for left-hand users and allows you to use it in low light conditions

【Ultra-Fast & Precision Accurate】This meat thermometer digital delivers accurate readings within ±1°F/±1°C in just 2–3 seconds, with a wide temperature range of -58°F to 572°F (-50°C to 300°C). No more waiting over the heat - know your food's exact temperature instantly.

Instant Read Food Thermometer | Our instant read thermometer features a temperature probe and advanced, highly accurate technology with 1-2 seconds response time; Instructions, meat temperature chart, comes pre-calibrated for your convenience, and recalibrating feature if needed.
Cooking Techniques for Even Results
Your marinated and patted-dry shrimp are now ready for the pan, where equipment selection and heat management determine whether you’ll achieve an evenly seared exterior or a disappointing steam. Use a large skillet with oil preheated to medium-high heat—oil’s superior smoke point outperforms butter for initial searing. Arrange shrimp in a single layer with adequate spacing to prevent moisture accumulation. Sear the first side for approximately two minutes without movement, allowing proper browning. Flip once and cook the opposite side for one to two minutes until complete opacity emerges. Minimal flipping prevents overcooking while maintaining firmness. Your heat control and moisture regulation directly impact crust formation and texture consistency across the entire batch. Just as seasoning and cooking techniques impact the final outcome of turkey preparations, the timing and temperature precision you apply to your shrimp will determine the quality of your results. While cooking time provides a general guideline, monitoring the shrimp’s appearance and texture serves as the most reliable indicator for doneness, similar to how internal temperature proves essential when grilling meats. Once cooked, brush the shrimp with garlic butter to enhance flavor and add richness to the finished dish. The shrimp should be firm to the touch but not tough or rubbery to maintain that tender, succulent texture you’re aiming for. To ensure optimal doneness, oiling the grill grates or pan surface adequately prevents sticking and allows for easy flipping without tearing the delicate protein. Consider pairing your perfectly grilled shrimp with versatile side dishes like pasta salad or roasted vegetables to create a complete and satisfying meal. Maintaining appropriate grill temperature and airflow ensures consistent heat distribution throughout the cooking process, resulting in perfectly cooked protein every time.

Light Buttery Flavor That Elevates Every Meal: Algae Cooking Club Chef-Grade Algae Oil enhances every dish with subtle richness. Its neutral profile makes it ideal for searing, baking, and dressings, transforming everyday meals into gourmet experiences.

Light Buttery Flavor That Elevates Every Meal: Algae Cooking Club Chef-Grade Algae Oil enhances every dish with subtle richness. Its neutral profile makes it ideal for searing, baking, and dressings, transforming everyday meals into gourmet experiences.
Identifying When Shrimp Are Perfectly Cooked
Because shrimp cook rapidly on the stovetop, recognizing doneness signals prevents the common pitfall of overcooking. You’ll want to employ multiple indicators when tracking cooking progress. Watch for color transformation from translucent gray to opaque white with bright pink accents—this shift happens within seconds. Simultaneously, observe shape curling from a wide “U” into a loose “C” formation; a tight “O” indicates overcooking. Test firmness by gently pressing with your spatula; properly cooked shrimp feel springy and bounce back, never mushy or rubbery. Using visual cues combined with texture assessment guarantees precision. For maximum accuracy, insert a digital thermometer into the thickest portion, targeting 120°F to 130°F internally. A waterproof instant-read thermometer proves especially practical for stovetop shrimp since it withstands splashes and provides quick readings in the pan. If you need a reliable option, the ThermoWorks Thermapen ONE has been tested as the fastest and most accurate instant-read thermometer for quick temperature checks. Remove shrimp immediately upon reaching these markers to capture peak doneness and prevent texture degradation. Similar to other seafood, monitoring internal temperature helps avoid the rubbery texture that results from overcooking. Just as with grilling burgers, using a meat thermometer ensures you achieve safe internal temperatures while maintaining optimal texture. After removing shrimp from heat, letting them rest for a minute allows residual heat to complete the cooking process without overdoing it. The firm C-shaped curl is the most reliable visual indicator that your shrimp have reached the ideal cooking point.

3X Faster 0.5s Readings: With cutting-edge Thermocouple applied temperature probe, ThermoMaven instant read meat thermometer for grill delivers speedy readings in just 0.5 seconds, 3X faster than the competitors, ensuring you always keep up with best cooking results.
2.0 inches large auto-rotating backlit display: Meat thermometer for grilling has a 180° auto-rotating backlit display, making this kitchen thermometer perfect for left-hand users and allows you to use it in low light conditions

【8X Faster + 4X More Precise】: Upgraded with an industrial-leading professional thermocouple sensor, Themomonster meat thermometer digital with NIST certified ±0.5℉ precision provides you the accurate temperature of your food in just 0.5 Seconds.
Finishing Touches and Service
Plating and garnishing transform perfectly cooked shrimp from stovetop to table, elevating both visual appeal and flavor impact. You’ll stack shrimp atop risotto for dynamic height, or position super colossal specimens as centerpieces. Layer microgreens over shrimp for textural contrast.
Your presentation garnishes should include fresh parsley sprinkled over garlic butter shrimp, with lemon wedges positioned for zesty enhancement. Drizzle lemon juice directly on the protein for brightness.
Temperature variations determine your service approach. Serve hot immediately after cooking to maintain ideal texture, or offer at room temperature as appetizers. You can refrigerate covered shrimp and serve the next day without quality loss. Pesto-coated shrimp can also be served cold with lightly dressed salad greens for a refreshing presentation option. The meaty, satisfying bite of super colossal shrimp makes them particularly impressive when showcased as the focal point of your plated dish. Pair with crusty bread to capture flavorful butter sauce, or top rice dishes for dinner presentation. For a bright accompaniment, serve with Pico de Gallo alongside your grilled shrimp to add fresh tomato and cilantro flavors. Consider topping with crushed red pepper or fresh herbs to add a final layer of flavor and visual interest. For easy cleanup and retained moisture, you can also serve shrimp alongside grilled vegetables prepared in foil packets. Add crisp coleslaw as a side to balance the rich, buttery shrimp with tangy crunch. If you prefer skewered presentation, thread shrimp onto flat metal skewers to prevent spinning during plating and service. These finishing touches maximize your stovetop shrimp’s potential.