To grill perfect onions, you’ll select medium to large yellow or red varieties and slice them into consistent 1/2 to 3/4-inch pieces. Brush them with olive oil, then season with salt and pepper after grilling—pre-grilling salt inhibits browning. Preheat your grill to high heat, oil the grates, and position onion slices cut-side down. Rotate frequently for even caramelization and golden browning. The techniques that transform ordinary onions into tender, caramelized sides require understanding grate placement and heat management.
Preparation Steps for Grilling Onions
How you choose and prep your onions sets the foundation for grilling success. Start by selecting medium to large yellow or red onions for even cooking. Remove the papery outer skin completely, then trim both the root and top ends with precise cutting angles to create stable, flat surfaces.
Slice your onions to your preferred thickness—half-inch rings for standard grilling or three-quarter inch slices for low-and-slow methods. Your trimming methods should guarantee consistent slice thickness throughout, which assures uniform cooking across all pieces. Olive oil helps achieve caramelized outside and tender inside surfaces. Adding water during cooking is a key hack that prevents onions from drying out and keeps them juicy while the natural sugars release to create that perfect sweet, caramelized flavor.
For skewered applications, thread metal skewers through ring centers to maintain alignment and prevent separation. Position skewer placement at the root end on one side to avoid splitting. Trim excess skewer length flush with onion edges for safety. For the thinnest, most uniform slices, use a mandoline slicer to ensure precision and consistency across all your onion rings. To protect your deck from grease splatters and spills while grilling, place a grill mat underneath your grill that extends beyond its footprint. Look for mats with high heat resistance that can withstand temperatures above 500°F to ensure durability and safety during extended grilling sessions. For optimal grilling results, ensure your grill grates are made from materials like porcelain-enameled cast iron that excel in heat retention and create superior sear marks on your vegetables. Choose oils with high smoke points like refined avocado or canola oil that can withstand grilling temperatures without burning.
Oiling and Seasoning Your Onions
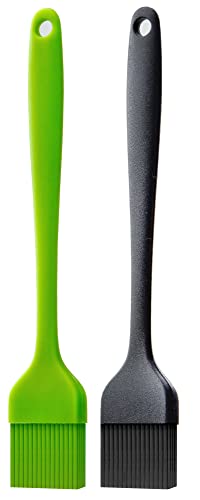
Once you’ve sliced and skewered your onions, you’ll want to prepare them for the grill by applying oil and seasonings that’ll enhance their natural flavor and prevent sticking. Begin with generous olive oil application, using approximately 1-2 tablespoons for two sweet onions. Use a brush to coat all sides evenly, ensuring complete coverage that prevents adhesion to grill grates.
For salt and pepper timing, apply seasoning after grilling rather than before. Pre-grilling salt inhibits browning, compromising caramelization. Post-cooking seasoning preserves the development of golden-brown char and allows the natural sweetness of grilled onions to remain prominent. Distribute kosher salt and freshly ground pepper evenly across both sides of your onion slices. Similar to grilled pineapple, you can balance the sweetness by sprinkling sea salt after grilling to enhance the natural flavors. This straightforward approach lets the caramelized, smoky flavor profile shine through. For best results, consider using sweet onion varieties like Vidalia or Walla Walla, as these caramelize beautifully compared to standard red or yellow onions. The heat from your grill will bring out natural sugars, creating an irresistibly sweet and delectable result. When brushing on the oil, use the same technique you would for vegetables like zucchini, ensuring uniform slices receive complete coverage for even cooking and charring. If you’re grilling smaller onion pieces or other vegetables alongside your onions, consider using a vegetable grilling basket to prevent food from falling through the grates while achieving perfect char and crispiness. You can also add a squeeze of lemon juice to brighten the flavors and add a touch of acidity that complements the sweetness. Avoid placing aluminum foil directly on your grill grates, as it can restrict airflow and heat distribution, leading to uneven cooking.

[ FOOD GRADE MATERIALS ]: This Silicone Basting Brush Set BPA Free,Non-toxic, lead free Odourless. With Stainless Steel core inside non slip handle.100% made in premium Food Grade silicone, unlike other bristle brushes, the silicone bristles will not break or shed in your food, more healthy.

100% BPA FREE & FOOD GRADE SILCIONE : This silicone basting brush made of 100% BPA FREE food grade silicone. All bristles of this basting brush set are BPA-free material which are safe and good for your health. whole basting brush body covered by soft silicone material which can offer you perfect using feeling. At the same time, this basting brushes kitchen silicone is non-staining and won't pick up food particles (unlike wooden basting brush).
Setting Up Your Grill
Before you place your prepared onions on the grates, you’ll need to establish the proper temperature and heat zones for ideal cooking results. Your fuel source options determine your prep timeline. Charcoal grills require filling a chimney starter to capacity and burning until coals show light ash coverage, then spreading them in a single layer across one-half of your grate for zone cooking. Gas grills need ten minutes of preheating with all burners on high before adjusting to your desired temperature.
Clean your grates with a brush after preheating, then lightly spray or brush them with oil. This prevents onion slices and wedges from sticking while ensuring even heat distribution. Proper grate placement—whether direct or indirect heat zones—keeps your onions cooking consistently throughout the process. For charcoal grills specifically, let coals burn down to medium heat between 350° to 450°F to achieve optimal caramelization and tenderness. You can fine-tune your temperature by adjusting air dampers to increase or decrease oxygen flow as needed. Keeping both lids closed during cooking helps retain heat and maintain steady temperatures for even grilling. Using high-quality charcoal ensures more consistent heat output and longer burn times for your cooking session. Medium- to medium-sized onions work best for achieving quick and even cooking on your prepped grill. For faster ignition, consider lighting your charcoal with starter cubes rather than newspaper for more reliable results. If you don’t have a chimney starter available, you can arrange charcoal in small piles over fire starters to build heat gradually and effectively.
SAFE TO USE - Not a fan of lighter fluid or electric torch? Made of wax and sawdust, our safe, natural fire starters are completely odourless and don’t emit any off-putting smell.
FAST AND RELIABLE FIRE STARTING WITHOUT LIGHTER FLUID NEEDED: Fire starter rolls help light charcoal or firewood quickly without lighter fluid, supporting reliable starts for grilling or outdoor fires with less time spent building ignition.

Ideal for Gravity Series grills and other charcoal products
Skewering Techniques for Even Cooking
With your grill prepped and grates oiled, you’re ready to safeguard your onions for cooking. Skewer material selection matters—metal skewers work best for direct grilling, while wooden skewers need pre-soaking to prevent burning. Position your peeled onion with the root end sideways, inserting your first skewer 0.75-inch from the root through the center. Use skewer insertion patterns by pushing additional skewers crosswise at regular intervals, penetrating every ring for structural integrity. For large onions, you’ll need approximately four skewers spaced evenly. Tap gently if you encounter resistance. Trim any protruding wooden skewer ends on both sides after insertion. Use approximately 4 skewers for each onion, ensuring proper spacing for balanced weight distribution. Sliced onions can be broken apart and reskewered if needed for flexibility in preparation. Consider flat metal skewers to prevent your onion pieces from spinning during the grilling process. If you’re grilling multiple onions or want to prevent pieces from falling through the grates, a perforated grill tray allows smoke infusion while keeping smaller pieces contained. For easier cleanup and release of delicate pieces, nonstick baskets provide an alternative to metal options when grilling at lower temperatures. For those who frequently grill skewered foods, specialized grills with automatically rotating skewers can ensure even cooking without constant attention. This technique guarantees your onion slices remain intact and cook evenly throughout the grilling process.

【PREMIUM STAINLESS STEEL, EXCELLENT WORKMANSHIP】The kabob skewers are made of premium stainless steel which is food grade, rust proof and heat resistant. The heavy duty grill skewers are corrosion resistant and can last long. All edges around the metal skewers are well polished, making the barbecue skewers safe to use. Metal skewer sticks is of solid one-piece design. The bbq kabob sticks is thick enough, allowing you put more weight on each skewer without getting bent or twisted

【PREMIUM STAINLESS STEEL, EXCELLENT WORKMANSHIP】The Metal skewers for Grilling are made of premium stainless steel which is food grade, rust proof and heat resistant. The heavy duty grill skewers are corrosion resistant and can last long. All edges around the metal skewers are well polished, making the barbecue skewers safe to use.

🍖【PREMIUM STAINLESS STEEL, PERFECT WORKMANSHIP】Metal kabob skewers sticks are made of premium stainless steel,food grade, rust-proof, heat-resistant, and corrosion-resistant. These heavy duty grill skewers are corrosion resistant and can last long. The edges of the barbecue skewers are well polished, and the metal skewers are safe to use. Metal shish kabab skewer is of solid one-piece design. The bbq kebab sticks skewers are thick enough to allow you to add weight without bending or twisting.
The Grilling Process
Now that you’ve skewered your onions properly, it’s time to fire up the grill and dial in the right temperature for your chosen cut. Preheat your grill to medium-high heat (450-500°F) for wedges, medium heat for rings on a baking sheet, or 400°F for marinated slices. If you’re using charcoal, create a two-zone fire with coals on one side. For gas grills, heat for 5-10 minutes, then lower burners to low.
Lightly oil your grill grates to prevent sticking and maintain consistency across all pieces. Position wedges cut-side down, rings on their baking sheet, and slices directly on the grates. Cook wedges 7-8 minutes total, flipping halfway using the root end for structural integrity. Since onions are denser vegetables, they may benefit from going on the grill first or allowing extra time compared to softer vegetables like zucchini or bell peppers. Monitor your onions for golden browning and tenderness to achieve ideal visual appeal and flavor. Turn frequently to ensure even cooking and prevent charring on a single side, similar to how you would rotate corn to achieve uniform husk blackening. Roll the onions occasionally to achieve even grill marks and prevent burning on one side. After grilling, let the onions rest for a few minutes to allow the heat to redistribute evenly throughout each piece. After grilling, consider garnishing with fresh herbs or a squeeze of lemon juice to add brightness to the dish.
Achieving the Perfect Char
How you manage heat and apply oil will ultimately determine whether your grilled onions develop that coveted caramelized exterior or simply soften without distinction. Set your grill to medium-high or high heat (400-500°F) for ideal charring. Brush both sides of your onion slices generously with olive oil—this coating acts as a heat transfer medium and prevents sticking while promoting even browning.
Employ a two-zone fire configuration to control charring intensity. Flip your onions every 10-15 minutes, rotating them between hot and cool zones to achieve consistent color development without burning. This technique balances the smoke profile with caramelized sweetness throughout. Vidalia onions are particularly well-suited for grilling due to their naturally sweet flavor profile, which intensifies under high heat.
Rotate your pieces strategically around the grill. Total cooking time typically ranges from 12-40 minutes depending on thickness and heat level. Handle onions gently using tongs at the root end to maintain structural integrity during each flip. Watch for visible grill marks as an indicator that your onions have achieved proper caramelization on each side. Monitor the aroma and color as key indicators that your onions are properly caramelized and ready to remove from heat. For a hands-off alternative, you can wrap your onions in a foil pouch to achieve caramelized results with minimal monitoring. If grilling outdoors isn’t an option, consider using a cast-iron grill pan indoors to achieve similar charred results with a smoky flavor. After grilling, allow your onions to rest for 5-10 minutes so their juices can redistribute and flavors can settle before serving.
Temperature and Timing Guidelines
Once you’ve mastered the charring technique, managing your grill’s temperature and timing becomes the next layer of control you’ll need. For ideal temperature calibration, set your grill between 350-500°F depending on your method. Medium-high heat (450-500°F) works best for direct cooking, requiring 7-8 minutes with a halfway flip. Consistent grill monitoring prevents burning and maintains even caramelization across all surfaces.
If you’re using skewered onions, maintain 400°F and baste every 4-5 minutes per side. For larger pieces, allow up to 10 minutes on medium-high heat. Should temperatures run too high, simply move your onions away from direct heat temporarily. Unlike traditional stovetop methods that demand constant stirring, the precision cooking of modern grills allows you to monitor your onions less frequently while still achieving rich, caramelized results. For best results, use a grill basket to prevent smaller onion pieces from falling through the grates. To maximize your grill’s available space when cooking multiple items, consider using vertical racks that hold food upright and create room for additional ingredients.
Oil your grates beforehand to prevent sticking and improve heat transfer. Clean surfaces guarantee proper contact with your grill’s heat source throughout cooking. When grilling on grass or decking, place a fire-resistant mat underneath to protect surfaces from grease drips and heat damage. If you frequently alternate between grilling and flat-top cooking, consider a grill griddle combo that offers both ceramic-coated griddle surfaces and traditional grates in one unit. When not in use, protect your flat top grill with a heavy-duty polyester cover to maintain its cooking surfaces and extend its lifespan. Gas grills with cast iron grates provide superior heat retention and even distribution, making them excellent for maintaining consistent temperatures while grilling vegetables.
Finishing Touches and Flavor Enhancement
The difference between merely grilled onions and truly exceptional ones often comes down to how you season and dress them after cooking. Apply seasoning blends immediately while the onions retain heat, allowing flavors to penetrate thoroughly. Salt, pepper, cumin, and smoked paprika create foundational profiles you can build upon.
Consider sauce pairings that complement your main dish. BBQ sauce delivers classic richness, while balsamic vinegar adds sophisticated depth. Honey mustard offers tangy complexity that works across various cuisines. For optimal results, coat onions with honey mustard, balsamic vinegar, or BBQ sauce to enhance their natural sweetness and add depth to your grilled vegetables.
Fresh chopped herbs sprinkled over warm onions provide both visual appeal and aromatic brightness. Try adding garlic or rosemary for an extra layer of savory flavor that complements the sweetness of caramelized onions. For enhanced richness, drizzle warm butter infused with beef bouillon across the surface. Using high-heat-resistant utensils ensures safe handling when applying these finishing touches to your hot grilled onions. Golden-brown coloring signals ideal doneness and readiness for these final embellishments. Thin slicing of onions before grilling ensures even caramelization that creates the perfect foundation for all your finishing touches. A squeeze of lime brightens flavors and adds citrusy freshness that balances the rich, smoky char of grilled onions. After cooking, you can repurpose leftover onion halves by rubbing them along grill grates to remove carbonization and charred food buildup. Once your grill has cooled, use a bristle-free brush to thoroughly clean the grates and prevent buildup that could affect your next cooking session.

Only the best ingredients: Our Onion Butter seasoning is the perfect blend of salt, cane sugar and four alliums (toasted onion, scallions, chives), natural butter flavor and white pepper. Use it as a steak seasoning, on burgers, chicken thighs, turkey wings, rotisserie chicken, pork rubs, eggs, noodles, as a potato seasoning, french fry seasoning and (duh!) garlic bread.
Epic blend of onion, parsley, black pepper, coriander and roasted garlic

ONLY THE BEST INGREDIENTS: Our Onion Butter seasoning is the perfect blend of salt, cane sugar and four alliums (toasted onion, shallots, scallions, chives), nutritional yeast, natural butter flavor and white pepper. Use it as a steak seasoning, on burgers, chicken thighs, turkey wings, rotisserie chicken, pork rubs, eggs, noodles, as a potato seasoning, french fry seasoning and (duh!) garlic bread.
Serving Suggestions
Your beautifully caramelized grilled onions deserve a starring role beyond the grill itself, and they’ll elevate countless dishes across your table. Pair with meats like steaks, lamb, and poultry for exceptional savory depth. You’ll enhance other dishes by topping burgers, incorporating them into quesadillas, or layering them onto gourmet grilled cheese sandwiches. Add grilled onions to pizzas, salads, and crostini for versatile applications. You can serve them alongside breakfast crepes with scrambled eggs and cheese, or complement risotto and roasted vegetables as a side dish. Whether you’re creating gourmet presentations or casual weeknight meals, these onions transform ordinary dishes into restaurant-quality fare. Their sweet, caramelized flavor profile adapts seamlessly across cuisines, making them an indispensable addition to your cooking repertoire. Try grilled onions with fajitas alongside peppers and portobello mushrooms for a complete vegetarian meal. For even more depth, brush them with a marinade of olive oil, balsamic vinegar, and fresh herbs during the final minutes of grilling. Consider using a grill basket to prevent smaller onion pieces from falling through the grates while ensuring even charring. For Korean BBQ preparations, use a ridged grill pan with sloped surfaces to drain excess moisture while achieving perfect char marks on your onion slices. For best results, serve the grilled onions while they’re still warm to maximize their tender texture and preserve the caramelized exterior. Keep your long-handled tongs nearby for safe handling and precise placement when transferring the hot onions to your serving platter. If you prefer easy cleanup, wrap your onion slices in foil packets before grilling to contain all the flavorful juices and seasonings.

Durable Construction: UNCO grill wok is made from high-quality stainless steel, ensuring it can withstand high grilling temperatures and provide long-lasting durability.

Complete High-Quality Grilling Value Set - Conquer the grill with your own tools to help you prepare your famous BBQ recipes. The SHIZZO Set includes a grill basket, basting brush, Stainless Steel Skewers, and even a portable case for a BBQ away from home.

【TO BE A PROFESSIONAL CHEF】-Grilling is an art. And when you’ve mastered that art…your friends double in numbers. JY COOKMENT Grill basket can help you to the master of grilling.
Storage and Reheating Tips
Since you’ll likely prepare more caramelized onions than you’ll use immediately, understanding proper storage and reheating methods guarantees you’ll maximize their shelf life and maintain their quality.
For refrigerator storage, keep your onions in airtight containers for approximately five days. If you’re freezing them, portioning options like dividing them into smaller quantities enable convenient single-use defrosting and extend your storage duration up to three months. Label each container with the preparation date for accurate tracking. Store your containers in a cool, dark place away from potatoes to prevent gases from accelerating spoilage.
Before freezing, cool your onions to room temperature and remove excess surface moisture. When you’re ready to use them, thaw overnight in your refrigerator. Reheat gently on low to medium heat, stirring occasionally while covering the pan to retain moisture and prevent oil separation. For best results, avoid rushing the process of reheating to ensure the onions regain their rich, caramelized flavor and jammy texture. Always ensure you reheat thoroughly before eating to maintain food safety standards. Proper storage involving refrigeration at consistent temperatures helps prevents cross-contamination and maintains quality. If you frequently grill outdoors, consider investing in durable grill covers to protect your equipment from weather elements and extend its lifespan. When selecting a cover, look for options with waterproof coatings and reinforced seams to ensure long-lasting protection against harsh weather conditions. Measure your grill including any side shelves before purchasing to ensure you get a snug fit that won’t blow away in wind.