You’ll create the perfect grilled cheese by selecting a 10-inch cast iron or non-stick skillet for even heat distribution. Start with medium heat on a cold pan, then reduce temperature for the second side to prevent burning while melting your cheese thoroughly. Use a two-cheese blend like medium cheddar and gruyere on artisan bread sliced one inch thick. Butter the pan generously, flip carefully, and allow your sandwich to rest briefly before serving. Mastering these fundamentals unveils endless variations and advanced techniques.
Selecting the Right Pan
Since you’re aiming for perfectly melted cheese and evenly browned bread, your pan choice fundamentally determines your success. When evaluating pan material options, consider cast iron for superior thermal properties and reliable heat distribution across multiple batches. Non-stick skillets offer convenience through easier flipping and minimal cleanup, while still delivering consistent browning. Griddles present another viable option, particularly when you’re preparing several sandwiches simultaneously.
For pan size selection, choose a skillet large enough to accommodate your sandwich comfortably without crowding. A 10-inch pan works well for standard sandwiches, allowing adequate space for proper browning on both sides. Regardless of your material choice, prioritize consistent heat retention—your pan must maintain stable temperatures throughout the cooking process. The stove should be set to medium-low heat to ensure your grilled cheese cooks evenly without burning. Consider using cheeses like white cheddar, muenster, or Swiss for optimal melting and flavor. Cast iron skillets and griddles will wipe clean with just a few toasted crumbs or crispy cheese left behind, making them excellent choices for frequent cooking. Grill pans with raised ridges can also create attractive grill marks while allowing excess butter or cheese to drain away. For those seeking larger-scale applications or outdoor cooking, modular outdoor kitchens can accommodate high-end grill equipment that handles multiple food preparations simultaneously. To protect outdoor cooking surfaces from grease and heat damage, consider using fire-resistant mats beneath any outdoor equipment. Applying a parmesan garlic butter spread to the bread’s exterior will create a golden, crispy crust while keeping the cheese perfectly melted inside. This consistency directly impacts whether your cheese melts properly while your bread browns evenly.

Quality Cast Iron Frying Pan: The Lodge Seasoned Cast Iron Skillet is loved for its great heat retention, incredible durability, and ability to make almost any recipe you dream up

CAST IRON SKILLET is 10.25 inches in diameter and includes red silicone hot handle holder. An improvement on the original: the Lodge Cast Iron Skillet, featuring an assist handle. This will be your go-to pan for generations to come

Homemade Favorites: The Lodge Seasoned Cast Iron Baker’s Skillet is designed for rolls, cobblers, breads, and everyday recipes fresh from the oven
Mastering Heat Control
Getting your heat right can make or break your grilled cheese, so you’ll want to nail this step before you even butter your bread. Start with a cold pan on medium heat to achieve optimal perfect heat distribution across the cooking surface. This gradual warming prevents scorching while allowing cheese to melt fully before the exterior browns. Patience is essential to avoid the unpleasant combination of charred bread and unmelted cheese.
Once heated, maintain consistent temperature maintenance by reducing to medium-low after flipping. Cook your first side on medium for proper browning, then flip and lower the heat for the second side, cooking 4-5 minutes total. Pan temperature is the most crucial factor in determining whether your cheese becomes perfectly gooey or remains disappointingly solid.
For alternative appliances, set electric griddles to 275°F, electric skillets to 300°F, or air fryers to 375°F for seven minutes with a halfway flip. Each method requires monitoring to avoid over-browning while achieving that ideal crispy-melty balance.
Choosing Your Cheese
Now that you’ve mastered heat control, your next decision—choosing the right cheese—will determine whether your grilled cheese achieves that perfect balance of crispy exterior and creamy interior.
You’ll find that cheese pairing strategy matters considerably. A two-cheese blend combines melting quality with distinct flavor profiles, preventing bland results from single-cheese selections. Consider pairing medium cheddar with gruyere for nutty warmth, or monterey jack with vintage cheddar for superior texture. American cheese can also enhance your blend by providing superior melting ability that ensures an evenly gooey center.
You shouldn’t overlook specialty options like fontina or havarti, which contribute creamy melting qualities to multi-cheese combinations. However, you’ll want to avoid hard aged cheeses and squeaky varieties that create suboptimal textures. While cheese offers nutritional benefits like protein and calcium, selecting cheeses with proven melting performance is key to texture quality. Keep in mind that processed cheeses like American cheese contain high fat and sodium content that may not be suitable for all diets. For maximum crispiness, consider applying mayonnaise on the outside of your bread before cooking, as it offers higher heat tolerance and more even browning than butter alone. You can also explore tasty alternatives to butter such as olive oil or avocado oil for different flavor profiles.
Your flavor balance improves when you select cheeses with proven melting performance. Gruyere’s high water-to-oil ratio and monterey jack’s buttery notes deliver exceptional results in your frying pan sandwich. For household cooking, removable and dishwasher-safe plates on sandwich grill machines can simplify cleanup if you prefer using appliances over traditional pan methods. The recommended combination of sliced medium cheddar, gouda, and Havarti has been celebrated as the ideal cheese blend for achieving that signature melty cheese center.

One 8 ounce block of Medium Cheddar Cheese

One 16 ounce block of Mild Cheddar Cheese
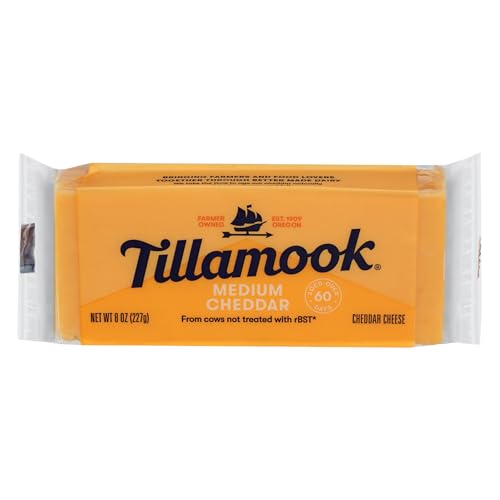
Contains no animal rennet
Preparing Your Bread
Your bread selection fundamentally shapes your grilled cheese’s success, so you’ll want to source quality bakery bread with a crusty, hearty texture rather than settling for standard store-bought loaves. Choosing artisan bread varieties—such as ciabatta, olive, or Japanese milk bread—elevates your sandwich substantially. For an exceptional option, consider Martin Philip’s Jalapeño-Cheddar loaf, which combines durum flour and cornmeal for a distinctive flavor profile perfect for grilled cheese.
Request the bakery staff slice your bread approximately one inch thick. This thickness provides adequate surface area for ideal cheese contact and structural integrity during cooking. Perfect bread textures balance crispness with chew; Japanese milk bread offers springiness while allowing proper crisping, whereas crusty options deliver satisfying crunch. Pairing your grilled cheese with tangy, creamy tomato soup creates a harmonious and satisfying meal that enhances the overall dining experience. To complete your meal, consider adding crispy vegetables and chips as accompaniments that balance the sandwich’s richness.
Before cooking, lightly toast both bread interiors without butter for approximately one minute. This creates superior cheese adhesion. Then butter all four exterior surfaces—top, bottom, and both edges—using softened butter that spreads without tearing your delicate bread structure. Like using a non-stick surface on a cooking grill, proper butter application prevents sticking and ensures even browning throughout the cooking process. Consider using thick white bread for your classic grilled cheese to ensure optimal browning and structural support during the cooking process. Just as heat-resistant mats protect outdoor cooking surfaces, a properly preheated frying pan establishes the ideal cooking environment. Preheating your frying pan before adding the sandwich helps establish crispy exterior texture similar to traditional griddle methods.

No hydrogenated fats or high fructose corn syrup allowed in any food

Made for the cheese fanatic who pairs a gooey grilled cheese with a bowl of tomato soup

Butter and Alternative Spreads
Two primary considerations drive your spread selection: cheese type and desired crust texture. For creamier, higher-moisture cheeses, use salted butter at room temperature to achieve ideal butter consistency and spreading technique without tearing your bread. Apply 30g (2 tbsp) per sandwich for an enhanced, crispy exterior.
With concentrated, low-moisture cheeses like sharp cheddar or asiago, unsalted butter prevents overseasoning and lets cheese flavors dominate. Alternatively, mayo provides superior browning compared to traditional butter—apply it directly to bread like you’d use butter. Bright, acidic ingredients like lemon aioli or pickled onion spread can balance the saltiness of aged cheeses while adding complexity to your sandwich. For best results, grate the cheese rather than slicing it to ensure superior melting and even distribution throughout your sandwich. Creating a grilled cheese exterior with shredded cheese melted in the skillet before placing your sandwich adds a crispy, crunchy outer layer similar to restaurant techniques. A stovetop griddle can provide superior heat evenness and retention compared to standard frying pans for achieving consistently golden results.
For flavor complexity, consider hot honey made with guajillo and Fresno chiles, drizzled after cooking to prevent sugar burning. Pepper jelly offers similar Southern-style sweetness and heat without requiring advance preparation. Layering cheese on both bread slices creates extra gooeyness and enhances the overall melting effect. Using a grill press while cooking helps achieve even heat distribution and a perfectly flattened sandwich. To preserve your sandwich’s quality if you have leftovers, store it properly and consider reheating in a 350°F oven to restore crispness and cheese texture before serving. Each option elevates your grilled cheese beyond basic execution.

Brought to you by Whole Foods Market

365 by Whole Foods Market products give you that dance-down-the-aisles feeling, virtual aisles too! Our huge range of choices with premium ingredients at prices you can get down with makes grocery shopping so much more than tossing the basics in your cart.
![The Great Grilled Cheese Book: Grown-Up Recipes for a Childhood Classic [A Cookbook]](https://m.media-amazon.com/images/I/61Ue-j+1PcL._SL500_.jpg)
The Cooking Process
Before you add your sandwich to the pan, you’ll want to preheat your skillet over medium-low to medium heat for several minutes, ensuring even browning throughout cooking. Use a heavy-based or cast iron skillet for uniform heat distribution. Cast iron’s legendary heat retention makes it particularly effective for achieving consistent results. The well-seasoned surface of quality cast iron pans like those from Lodge also ensures food releases easily without sticking. To maintain your cast iron’s non-stick properties, periodically apply a thin layer of high-smoke point oil and heat to season the surface.
Begin sandwich assembly by placing your first bread slice butter-side down in the hot pan. Add cheese slices directly onto the unbuttered side, then top with your second slice butter-side up. Press lightly with a spatula for even contact.
Cook the first side for 2-3 minutes until golden brown, pressing occasionally for crispiness. Flip carefully using a wide spatula to maintain integrity. Cook the second side another 2-3 minutes until golden. Monitor the cheese melt progress by peeking between layers if needed. Remove when both sides reach deep golden and cheese fully melts. Just as investigative techniques require proper methodology to verify results, ensuring even cheese distribution is critical for achieving the perfect grilled cheese. For best results, you can slice or shred your desired cheese before cooking to ensure it melts evenly throughout the sandwich. Unlike complex cooking methods such as pellet smoking, grilled cheese requires only basic equipment and minimal time. Cast iron’s excellent searing ability also helps create the crispy, golden-brown exterior that makes grilled cheese so satisfying. Serve immediately.

5.5-inch square skillet for grilled cheese or ham & cheese sandwiches
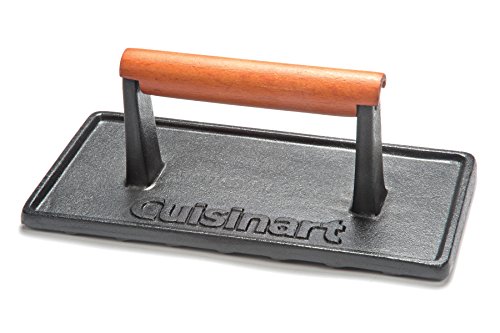
DURABLE: Heavy-duty 2.4-pound cast iron for even heat distribution and durability.

Seasoned with oil for a natural, easy-release finish that improves with use