You’ll light your charcoal grill perfectly by using a chimney starter—fill the bottom chamber with crumpled newspaper, add charcoal to the upper chamber, ignite multiple spots, and wait 15-20 minutes until coals turn white-gray. Transfer hot coals evenly across your grate using heat-resistant gloves. Recognize readiness through uniform ash layer, red glow beneath the surface, and minimal smoke. Adjust your vents to control airflow and temperature. Master these fundamentals, and you’ll reveal advanced techniques for consistent results.
Preparing Your Charcoal for Lighting
Before you light your charcoal grill, you’ll need to select the right fuel and arrange it properly for ideal ignition. Choose between briquettes for consistent, prolonged heat or lump charcoal for faster ignition and higher temperatures exceeding 700°F.
For a standard 22-inch grill, you’ll need 50-100 briquettes. Arrange your charcoal using the pyramid arrangement method: create a circular base, then stack two layers deep in a criss-cross pattern at the grill’s center. This configuration concentrates flames and promotes efficient fire spread without requiring a chimney starter. Always ensure your grill is positioned for proper airflow before arranging your charcoal. Proper airflow through the vents will later help you regulate the charcoal’s burn rate and control heat output during cooking.
If you’re using lighter fluid application, apply it sparingly—no more than 1/4 cup per 5 pounds of charcoal. Pour the fluid onto the pyramid base before igniting at multiple spots with a long-handled lighter. Avoid using lighter fluid in enclosed spaces, as it can impart undesirable flavors and pose safety hazards indoors. For a cleaner alternative that eliminates chemical flavors, consider using a chimney starter to light your charcoal without lighter fluid. Another option is to place fire starters just under the top charcoal layer, which allows for optimal oxygen flow and heat development as you build your fire. You can also use starter cubes in smaller quantities than package directions suggest for a cost-effective and efficient lighting method. If you prefer eco-friendly options with minimal smoke, coconut shell charcoal offers sustainable performance with low ash production.
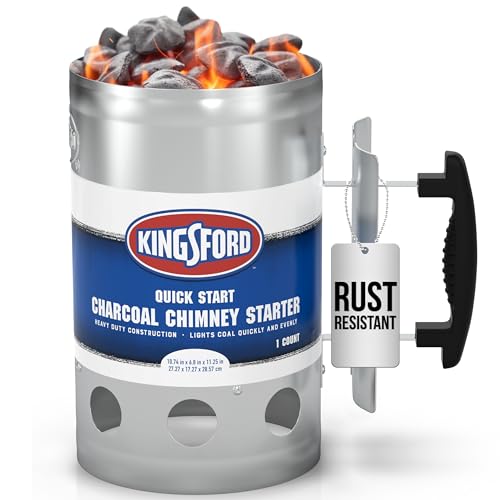
FAST CHARCOAL LIGHTER PULLS STEADY AIRFLOW FOR EVEN IGNITION: Helps get briquettes lit quickly and more evenly by pulling steady airflow through the chimney, reducing time from lighting to cooking for grills, smokers, and kettles.

Lights coals in under 15 minutes. Dimensions : 8 H x 5.8 W x 10.4 D inches

COMPACT STARTER - MEASURES 8.1 x 5.7 x 10 INCHES: This chimney starter is intentionally compact, measuring 8.1 inches wide by 5.7 inches deep by 10 inches tall. Designed for small to medium sized grills. Not a full-sized chimney - check dimensions
The Chimney Starter Method
While the pyramid arrangement and lighter fluid method‘ll work in a pinch, you’ll achieve more consistent results with a charcoal chimney starter—a cylindrical metal device that concentrates heat and accelerates ignition through forced airflow. Fill the bottom chamber with crinkled newspaper, then add lighter cubes for reliable ignition. Place your charcoal quantity in the upper chamber—quarter chimney for low temperatures around 225°F, half chimney for medium heat (275-300°F), or full chimney for high-heat roasting above 350°F. Ignite the kindling in multiple spots, then wait 15-20 minutes until charcoal edges turn gray and smoke dissipates. Once coals glow visibly through vents, pour them into your firebox using heat-resistant gloves. The handle provides easy handling of the hot chimney starter during this critical transfer step. For optimal safety, wear close-toed shoes with heavy-duty soles to protect your feet from any hot coals that may escape during the transfer. Apply coal distribution techniques with tongs or a metal spatula to spread coals evenly for consistent heating. After your grilling session, use a bristle-free grill brush to clean grates while they’re still warm, which makes removing residue easier than waiting for the surface to cool completely. Look for models with 18-inch non-slip handles that provide safe distance from heat and better leverage when scrubbing away stubborn buildup. Consider a brush with a detachable cleaning head that can be removed and washed in the dishwasher after use, extending the tool’s lifespan significantly. If you prefer nylon-bristle brushes, wait until grates cool completely since nylon can melt when used on hot surfaces unless the product specifically indicates high-temperature tolerance. For tough baked-on residue on cold grates, specialized cleaners like Carbona’s 2-in-1 formula can cut through grime in just five minutes without heavy scrubbing.
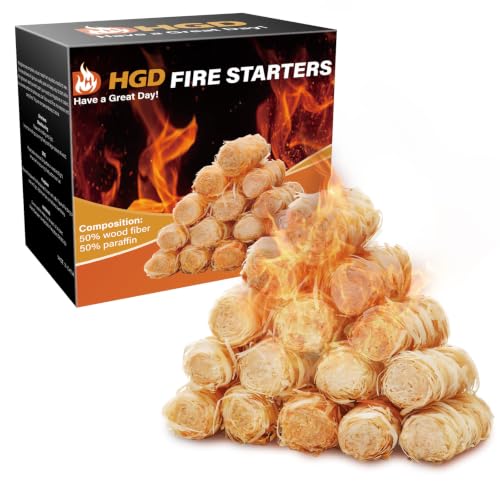
Safe & Waterproof: The fire starter is made with natural wood shavings which are safe, nontoxic and efficient without any harmful substances and waterproof is ideal for indoor or outdoor

Porcelain-Enamel coating for Superior quality: double-enameled construction withstands extreme heat from while resisting deformation. Protects against thermal shocks and corrosion for long-term durability. simplifies cleaning
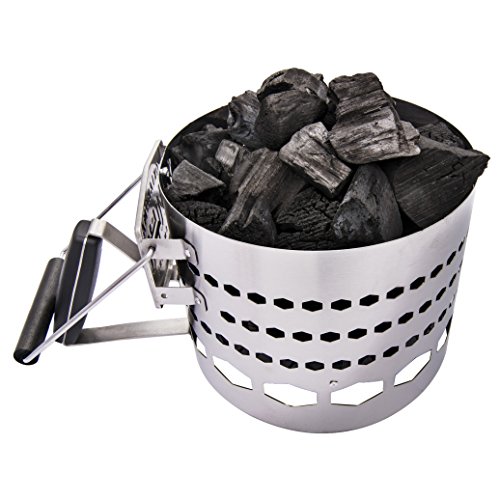
Ready in half the time compared to standard charcoal chimney starter
Using Lighter Fluid Safely
Though the chimney starter method offers superior consistency, lighter fluid remains a viable option when you’re prepared to follow strict safety protocols. You’ll pour the recommended amount evenly over unlit charcoal, then wait one minute for absorption. Never apply fluid to hot or lit coals.
Cap your bottle immediately after use and position it away from the grill. Light the coals right after, keeping a fire extinguisher nearby and wearing protective gear. Wait 15-20 minutes until coals turn white or gray before cooking.
For fluid storage, keep containers in cool, dry locations away from heat and flames. Regarding fluid disposal, soak spills with paper towels and dry the area completely before igniting. Always wash your hands thoroughly after handling lighter fluid. Store lighter fluid in a cool, dry place away from children and pets to prevent accidental access or exposure. Never use gasoline or ethanol substitutes, as hazardous alternatives can cause severe injuries and dangerous chemical reactions. When you’re finished grilling, extinguish the coals safely by closing all vents completely to cut off the oxygen supply. Let the coals cool completely before handling or discarding to prevent burns and accidental fires. If transporting propane tanks for your gas grill, always keep them upright in a well-ventilated vehicle to prevent leaks and ensure safety. After your grill has cooled, clean any grease buildup with dish or Dawn to prevent dangerous flare-ups during your next cookout. Just as proper preparation is essential when grilling steaks, ensuring your charcoal reaches the right temperature involves using an instant-read thermometer to verify your grill surface hits the optimal heat range for searing.

FAST & CLEAN IGNITION FOR CHARCOAL COOKING – Light lump charcoal or briquettes instantly with Billy Buckskin charcoal lighter fluid for grilling, engineered for quick, consistent, and mess-free ignition. Ideal for charcoal grills and chimney starters, it delivers a clean burn with minimal smoke and no sticky residue for a smooth start every time.
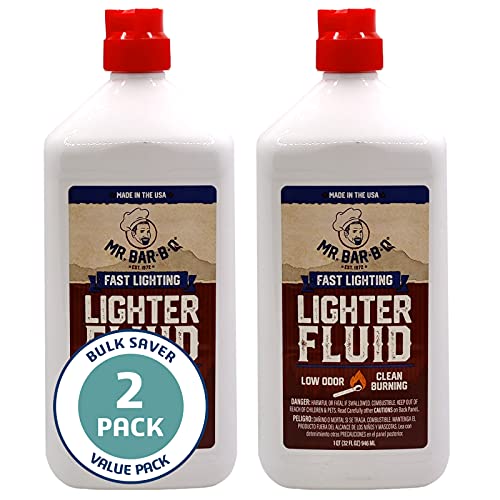
DYNAMIC DUO FOR RELIABLE IGNITION - Get twice the power with Mr. Bar-B-Q Lighter Fluid, proudly Made in the USA for top-notch quality and performance. This set includes 2 x 1-quart bottles of premium lighter fluid, ensuring smooth and efficient ignition every time you grill. Perfect for gas, BBQ, or charcoal grills, as well as fire pits, smokers, and campfires, this versatile solution is your go-to for all outdoor cooking needs.

FAST & CLEAN IGNITION FOR CHARCOAL COOKING – Light lump charcoal or briquettes instantly with Billy Buckskin charcoal lighter fluid for grilling, engineered for quick, consistent, and mess-free ignition. Ideal for charcoal grills and chimney starters, it delivers a clean burn with minimal smoke and no sticky residue for a smooth start every time.
Alternative Lighting Techniques
If lighter fluid doesn’t suit your grilling style, you’ve got several reliable alternatives that’ll get your charcoal burning efficiently. The electric starter technique offers a clean, chemical-free option: nestle the heating coil into your charcoal pile, plug it in for 5-10 minutes, then carefully remove it once coals glow. Be cautious, as the element stays hot for an extended period after unplugging. Paraffin or lighter cubes provide another excellent choice—tuck 2-3 cubes beneath your charcoal and light them directly. These cubes perform well in adverse weather and ignite your coals within 30 minutes. For household simplicity, soak a wadded paper towel in cooking oil and tuck it at your coal base. Natural fire starters like ZIP cubes can reach temperatures up to 856°F, making them highly effective for igniting charcoal quickly. The charcoal chimney starter represents the fastest method available, taking less than 20 minutes total time to grill by using newspaper and super-heated air. Finally, a propane torch delivers the quickest, most precise ignition with direct flame control over your briquettes. For serious smokers aiming to maintain consistent temperatures, a quality charcoal basket can improve airflow and fuel efficiency during extended cooking sessions. Some modern grills come with built-in starters that eliminate the need for separate lighting tools entirely, offering integrated ignition systems that simplify the entire process. To ensure you’re hitting optimal cooking temperatures across different types of meat, invest in a high-quality meat thermometer that takes the guesswork out of doneness. If you’re looking for versatility beyond traditional grilling, consider pairing your charcoal setup with a smokeless fire pit that offers efficient wood burning and can accommodate grill grates for dual-purpose outdoor cooking.

Easy to Use : Just put charcoals to cover the heat coils elements part , and plug in the socket. Wait 6-10 mintues. Your grilling will ready to use. No extra jobs. Never worry coals will dim or blowed out

Heat Speed Fast Charcoal Starter- ASANMA 800W, 120V charcoal lighter heats up quickly and efficiently.Compared to the single loop, this three-ring design of the heat coils element electric charcoal starter more surface area ignighter works awesome, provide continuous heat for coals and ignite them within 6-8 minutes.

MATERIAL: Heavy duty stainless steel
Recognizing When Your Coals Are Ready
Once you’ve selected your lighting method and ignited your charcoal, you’ll need to know when it’s actually ready for cooking. The primary visual indicators of readiness include a uniform white-gray ash layer covering the charcoal surface with a red glow beneath. You’ll observe minimal smoke emission patterns—thick smoke indicates the ignition phase hasn’t concluded, while thin, consistent smoke signals stable burning. The charcoal shouldn’t display visible flames; instead, it should emit a steady, warm radiant glow. Use a thermometer to confirm you’ve reached your target temperature range: 450°F to 550°F for direct-heat grilling or 225°F to 350°F for smoking. For a practical hand test, hold your hand about 5 inches above the grate and count seconds until the heat forces you to pull away—high heat registers 2-4 seconds, medium heat 5-6 seconds, and low heat 8-10 seconds. These objective measurements guarantee consistent, even heat distribution for optimal cooking results. Properly heated charcoal delivers the distinct BBQ flavor that makes outdoor grilling a preferred cooking method. Whether you’re using lump charcoal or briquettes, both fuel types will exhibit these same readiness indicators when properly lit. Quality kettle-style grills like the Weber Master-Touch provide excellent airflow design that helps you achieve and maintain these ideal coal conditions reliably. For searing steaks, you’ll want to ensure your coals reach that higher temperature range where adjustable dampers help maintain steady high heat without creating hot spots. At this stage, maintaining a clean ash catcher ensures proper airflow and helps stabilize your cooking temperature once the coals are ready. The grill grate material also impacts your searing results, with cast iron grates offering superior heat retention compared to stainless steel options.
Preheating Your Cooking Grate
Now that your charcoal’s reached ideal temperature, you’ll need to preheat your cooking grate to guarantee even heat distribution and prevent food from sticking. Position your grate directly over the hot coals, ensuring it sits flat without gaps for uniform heating.
Close the lid during this conditioning phase while keeping both bottom and top vents fully open to maximize airflow. Preheat for 10 to 15 minutes on standard grates, extending to 20 to 30 minutes on cast iron for prime grate conditioning. Adjust vents to control airflow and regulate the temperature throughout the preheating process for optimal results.
This process brings your grill to proper cooking temperature, enabling consistent searing and caramelization. Proper preheating also helps reduce food safety risks by allowing the grill to reach safe cooking temperatures. Once preheated, brush or lightly oil the hot grate to further reduce sticking. For enhanced smoky flavor during cooking, consider adding hickory wood chips at a rate of 1/2 to 1 cup per hour. Avoid using softwoods like pine or cedar, as their resins create acrid smoke and burn too quickly for reliable cooking. Premium briquettes ensure consistent temperature maintenance throughout your preheating process, delivering reliable results every time. If you’re using a pellet smoker, Royal Oak charcoal pellets offer superior heat output and clean-burning properties for maintaining stable temperatures. Quality natural hardwood charcoal burns cleaner and hotter than products with additives, making it ideal for achieving optimal grilling temperatures. Your grill is now ready for cooking.
Spreading Coals for Even Heat
With your grate preheated and ready, you’ll turn your attention to arranging the charcoal itself—the foundation of consistent cooking temperatures. Spread your coals in a single, even layer across the entire charcoal grate, avoiding pyramid shapes or random pouring that create hot spots. Use coal arrangement techniques that prioritize consistency: distribute medium-sized briquettes uniformly in a thin layer, no more than one row deep. This methodology guarantees uniform heat distribution across your cooking surface.
Position your coals centrally during lighting to promote even burning throughout the bed. Full bed direct fire maximizes your cooking space while maintaining fairly even temperatures. After removing your starter, allow ten additional minutes for stabilization. Understanding the personality of your charcoal, whether you’re using B&B briquettes for steadier burns or lump charcoal for hotter, more reactive heat, will help you anticipate how your fire will respond. For those using kamado-style grills, the thick ceramic insulation requires only a fraction of the charcoal compared to standard grills while maintaining exceptional heat retention. Use long tongs to spread the coals evenly and ensure complete coverage across the grill area. For enhanced heat control during cooking, grills with adjustable charcoal grates allow you to raise or lower the coal bed to fine-tune temperatures without rearranging your fuel. When selecting a kamado for optimal coal efficiency, compare the cooking area specifications across brands like Big Green Egg, Kamado Joe, and Primo to match your typical grilling needs. Choose dense, large-piece lump brands if you need minimal ash production and the ability to reuse unburned charcoal between cooking sessions. This deliberate, methodical approach to coal placement eliminates unpredictable temperature zones and enables predictable, reliable cooking results. For sustained heat retention, keep the grill lid closed during cooking to minimize temperature fluctuations and conserve fuel.
Creating Two-Zone Cooking Areas
Why settle for a single cooking temperature when you can master the versatility of two-zone grilling?
After spreading your coals, you’ll create distinct heat zones by concentrating them on one side of the charcoal grate. Leave the opposite side empty—this becomes your indirect zone. The packed coals deliver direct, high-temperature heat for searing and quick cooking. The empty side provides gentler ambient warmth for slower cooking and roasting.
This setup proves invaluable when adjusting coals during cooking. You’ll manage heat intensity by repositioning food between zones without removing coals. By minimizing flare ups through strategic placement, you maintain consistent temperatures and prevent charring. The gradient between zones offers flexibility for recipes requiring varied heat levels. Using a charcoal chimney ensures even heat distribution before you begin cooking. Once coals are glowing and ashed over, you can easily adjust their positioning to fine-tune your cooking environment. This methodical approach gives you complete temperature control throughout your cooking session. Kettle-style grills excel at two-zone setups because their shape promotes even heat distribution and consistent temperatures across both cooking areas. Grills with dedicated smoker boxes add another dimension to two-zone cooking by allowing you to introduce wood smoke for enhanced flavor while maintaining separate heat areas. Offset smoker designs take two-zone cooking further by separating the firebox from the main cooking chamber entirely, giving you precise control over indirect heat and smoke circulation. Managing fire and vents properly helps you maintain stable temperatures in each zone throughout your cook. If you own a gas grill, consider using a charcoal tray to unlock authentic two-zone charcoal cooking capabilities without purchasing a dedicated charcoal unit.
Managing Airflow and Temperature Control
Once you’ve established your two-zone setup, controlling airflow through your grill’s vents becomes the primary lever for managing temperature. Your bottom vents function as intake dampers, pulling oxygen into the coals through a chimney effect. Your top vents exhaust smoke and excess heat for convection circulation.
For vent position adjustments, fully open both vents for high-heat cooking up to 650-700°F. Partially close them to restrict oxygen and lower temperatures to 225°F for low-and-slow cooking. Air intake optimization requires balancing intake and exhaust: close the bottom damper halfway to reduce oxygen without extinguishing your fire, or adjust the top vent slightly to prevent overheating. Experimenting with different charcoal types and blends will help you achieve your desired heat levels more efficiently. Leave the bottom vent fully open and use the lid vent to regulate temperature for optimal control. Regular maintenance and cleaning your grill helps ensure proper airflow and consistent temperature control during cooking sessions. For stainless steel grill components, use a microfiber cloth after each session to prevent ash buildup that can restrict vent performance. Additionally, emptying the drip pan regularly prevents grease buildup that can interfere with airflow and create fire hazards. After cooking, you can maintain your grill grates by using crumpled aluminum foil to scrub away residue while the grill is still warm. For stubborn buildup, a paste made from baking soda and vinegar can effectively break down carbonized residue without harsh chemicals.
Use a reliable thermometer to monitor temperature precisely and fine-tune your vent adjustments accordingly. Continuous practice is essential for mastering the precise vent adjustments needed for consistent results.

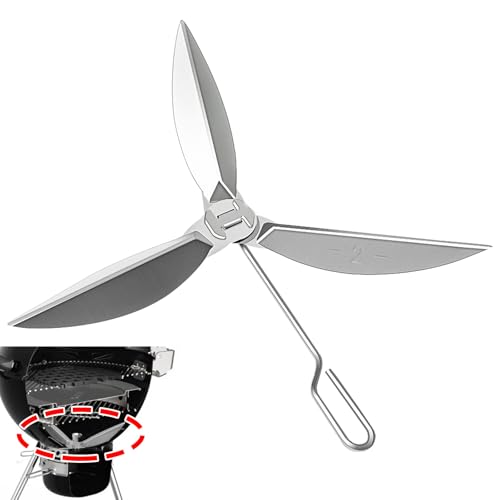
Fits Weber 22 in. One-Touch Silver charcoal grill

𝐓𝐡𝐞 𝐁𝐞𝐬𝐭 𝐂𝐡𝐨𝐢𝐜𝐞 — 𝐘𝐢𝐥𝐚𝐝𝐨𝐫 𝟐𝟐-𝟏/𝟐-𝐈𝐧𝐜𝐡 𝐎𝐧𝐞-𝐓𝐨𝐮𝐜𝐡 𝐂𝐥𝐞𝐚𝐧𝐢𝐧𝐠 𝐒𝐲𝐬𝐭𝐞𝐦 𝐑𝐞𝐩𝐥𝐚𝐜𝐞𝐦𝐞𝐧𝐭