You’ll nail London broil by selecting flank steak or top round, then marinating it for 4–24 hours in olive oil, soy sauce, balsamic vinegar, and Worcestershire. Let your steak reach room temperature before grilling at 600°F, searing each side for 1–2 minutes without moving it. Flip only once, monitor internal temperature with a thermometer, then rest the meat before slicing thinly across the grain. Mastering these fundamentals sets the stage for consistently exceptional results.
Selecting the Right Cut of Meat
Since London broil refers to a cooking method rather than a specific cut, you’ll find several viable options at your butcher counter, though flank steak remains the gold standard. Flank delivers exceptional flavor with dense muscle fibers that respond well to marination and high-heat cooking. London broil typically requires marinating and broiling to achieve optimal tenderness and flavor development.
If you’re prioritizing cost considerations, top round offers a budget-friendly alternative with comparable results at a lower price point. Top blade steak and sirloin cuts also work effectively, though they’re less conventional choices. Grass-fed beef is recommended for its leaner texture and higher nutritional value compared to conventional beef. When grilling London broil, lump charcoal provides the high heat needed for proper searing while delivering a clean, natural flavor. For enhanced versatility on your grill, consider using a cast iron griddle which offers superior heat retention and even distribution for achieving the perfect sear on your London broil.
You should consider grass-fed options for leaner texture with richer flavor profiles. For those who prefer smoking their London broil, kiln-dried hickory offers a bold, bacon-like flavor that pairs exceptionally well with beef cuts. If you’re exploring smoking options, pellet smokers combine precise temperature control with authentic wood-fired flavor ideal for low-and-slow beef preparations. If you’re shopping for a quality gas grill, models like the Weber Spirit E-325 feature dedicated sear zones ideal for achieving restaurant-quality results on London broil. Regardless of your selection, guarantee your cut measures 1 to 4 inches thick—this thickness allows proper searing while maintaining medium-rare doneness. Remember: you’ll slice any cut thinly against the grain after cooking to maximize tenderness.

USDA Certified Organic Steak: Organic Rancher Beef Striploin Steak comes from cattle raised on certified organic pastures with lifetime traceability. Free from antibiotics, added hormones, synthetic chemicals, and GMOs

Meets standards for animal welfare, feed, and more, so you can know about what you're buying (and eating)

ORGANIC, GRASS-FED, REGENERATIVE: Our ground beef is USDA Organic, 100% grass-fed & finished, supports regenerative farms, verified by Land to Market,100% pasture-raised, free range, humanely raised, with no feedlots EVER. Non-GMO and never contains antibiotics or added growth hormones. Always fresh, never frozen.
Marinating for Maximum Flavor
Once you’ve selected your ideal cut, you’ll want to maximize its potential through proper marination. Your marinade foundation combines ½ cup olive oil, ¼ cup reduced-sodium soy sauce, ¼ cup balsamic vinegar, and 2 tablespoons Worcestershire sauce, with 1-2 tablespoons Dijon mustard for enhanced flavor. Whisk these marinade ingredient ratios until sugar dissolves completely.
Place your steak in a gallon ziplock bag, pour the marinade over, seal it, and massage thoroughly to coat all surfaces. Puncturing the meat with a knife promotes deeper absorption. The ideal marinade duration ranges from 4-6 hours for tenderizing London broil, though overnight marination yields superior results. Refrigerate throughout, turning the bag once or twice. Don’t exceed 24 hours, as extended acid exposure causes protein breakdown and mushiness. For optimal results, marinate for at least 2-3 hours to allow the flavors to fully penetrate the meat. Before cooking, pat your steak dry for an excellent sear. After marinating, discard any leftover marinade rather than reusing it on cooked meat to ensure food safety, and always taste the marinade before adding extra salt to avoid over-seasoning your final dish. If you’re planning to serve grilled potatoes alongside your London broil, consider parboiling them first to reduce grilling time to just 10-15 minutes while achieving a crispy exterior. When transferring your marinated London broil to the grill, use a stainless steel grill tray with raised edges to catch any dripping juices and prevent flare-ups. Before igniting your grill, ensure it’s positioned in a well-ventilated outdoor space away from any flammable materials for safe operation. For high-heat grilling, brush your grill grates with refined avocado oil or other high-smoke-point oils to prevent sticking and achieve perfect grill marks. To protect your deck from grease drips and heat damage, position an extra large grill mat underneath your grill that extends beyond all sides for complete coverage.

Material: Grill pans for outdoor grill with Stainless steel. it Can ensure that it will not rust during use.The main body of the grill is made of high Carbon steel and is very durable


SET OF 2 STAINLESS GRILL TOPPERS: This grill topper set includes a small 11" x 7" grill grate and a large 11" x 17" grill grate, giving you the right size grill rack for anything from a quick side of veggies to a full family meal.
Preparing Your Steak and Grill
Your London broil‘s success depends on meticulous prep work that begins the moment you remove it from the refrigerator. Let it rest for 30 minutes to an hour until it reaches room temperature, ensuring even cooking throughout.
Trim excess fat carefully to prevent flare-ups during grilling. Pound hard with the ridged side of your meat mallet to break down tough muscle fibers and achieve uniform thickness. Pat the steak completely dry with paper towels—moisture prevents proper searing.
Meanwhile, preheat your grill to 600°F for 10 minutes. Clean the grates thoroughly and apply a light oil coating to prevent sticking. For safety and effectiveness, use a bristle-free grill brush to avoid any risk of stray wire bristles contaminating your cooking surface. Coiled bristle-free designs with 18-inch handles provide the reach and leverage needed to tackle stubborn grime while keeping your hands safely away from the heat. Position your steak on the hottest zone immediately after seasoning to develop that pivotal seared crust that locks in juices. Use a meat thermometer to ensure your steak reaches medium-rare at 130-135°F for optimal tenderness and flavor. For precise temperature monitoring, consider an instant-read thermometer with sub-second response times to check your steak at the perfect doneness. Models like the Thermapen ONE deliver one-second readings with exceptional accuracy, making it easier to catch that perfect moment of doneness. After grilling, allow the steak to rest so that residual heat can finish the cooking process and redistribute the juices throughout the meat.

【The Safest Bristle Free Grill Cleaner】:No wire bristles at all, no melting like nylon grill brushes; With this safe grill brush and scraper, your food will stay 100% Bristle Free. No more worry about swallowing some metal pieces, Let's free to gobble up some favorite barbecue! Save your effort and time, let’s just have fun! (PATENTED design)

【The Safest Grill Brush You Can Ever Find】: Once terrified by the horror news someone swallowed falling bristles? Or even the people around you have had such a terrible experience? Well, it's time for you to get rid of this fear completely. With our bristle free grill brush, there is no sharp, stiff and easy to fall short wire at all. Your food will always remain 100% bristle free, allowing you to go back to the happy time of free swallowing delicious barbecue! No more dread ever again!
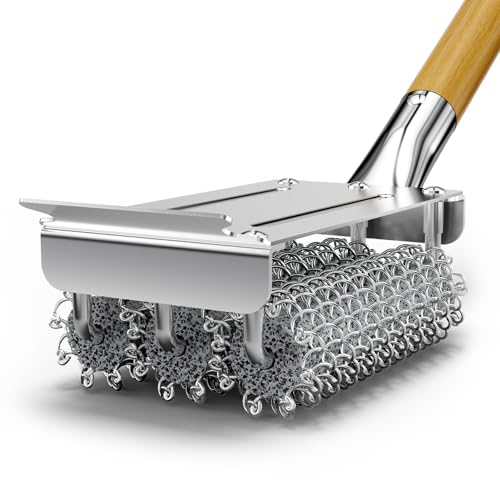
Bristle-free Safety: This grill brush features a patented stainless steel design with no loose wires or sharp edges, helping reduce the risk of broken grill brush bristle ending up in food. Designed with family health in mind, it offers a safer approach to BBQ cleaning.
Mastering the Grilling Technique
With your London broil properly prepped and your grill screaming at 600°F, the searing phase demands precision and restraint. Position your steak at a 45° angle to maximize contact with the grates, then sear each side for 1-2 minutes without moving it. This high heat searing locks in juices while developing that coveted crust. Resist the urge to constantly flip; instead, rotate 90° after the initial sear to create cross-hatch marks. Close the lid during this phase to concentrate heat and accelerate crust formation. Once you flip, open the lid for direct exposure. Your efficient heat management—utilizing a two-zone fire by searing on the hottest section before moving to cooler zones—ensures even doneness throughout. Use a meat thermometer to verify internal temperatures for consistency. An instant-read thermometer is particularly helpful for checking doneness without cutting into the meat and losing precious juices. For continuous monitoring without opening the grill, consider a wireless grill thermometer that lets you track internal temperature from a distance. Proper preheating also helps prevent food from sticking to the grates while ensuring safe cooking temperatures throughout. After removing from heat, allow your steak to rest so it can retain juices and reach optimal tenderness. Remember that thin steak requires less cooking time, so monitor your meat closely to avoid overcooking. While many grill at lower temperatures, experts recommend grilling steaks at 450°F to 500°F for optimal sear and flavor development.

More Stable Than Bluetooth: Our advanced RF technology ensures a stronger, more reliable connection than Bluetooth. This smoker thermometer provides the freedom to move around without losing connection! Monitor your BBQ from up to 1,000 feet away!

Bluetooth Monitor Remotely: Govee Bluetooth meat thermometer lets you check the temperature of your grill, smoker, or oven from your phone. With this smart BBQ thermometer, you can multitask while grilling.

Smart Display Base with Control: The ThermoMaven G1 wireless meat thermometer features a versatile smart display base that offers real-time temperature readings and allows you to set temperatures directly on the device—no app required. With our user-friendly one-click setup, you can connect the probe, pair it with the base, and start cooking in seconds—no complicated setup needed!
Controlling Temperature for Perfect Doneness
All that precision searing means nothing if you don’t nail the internal temperature—and that’s where most home cooks falter. Peak temperature calibration separates mediocre results from exceptional ones.
Use a digital instant-read thermometer to check the thickest part of your London broil. Insert the probe horizontally to avoid bone or fatty areas that skew readings. You’re targeting specific internal temperatures: 125°F for rare, 135°F for medium-rare, 145°F for medium, 150°F for medium-well, and 160°F for well-done. However, for thinner London Broil cuts of 1-1.5 inches, a timer is your best method for tracking doneness without the risk of inaccurate thermometer readings.
Here’s the critical detail: pull your meat 5°F below your target temperature. Carryover cooking continues raising the internal temperature after you remove it from the grill. After meat surface searing, this residual heat typically adds that final 5-degree bump to perfection. For optimal results, allow your London broil to rest for 5-10 minutes so the juices can redistribute throughout the meat. This resting period helps avoid the gray band of overcooked meat that appears when cutting too early. If you’re struggling with dryness in thicker cuts, try the ice cube technique by placing a frozen cube in the center before grilling to release moisture as it cooks. Remember to let the roast rest before slicing to allow the juices to redistribute throughout the meat, ensuring maximum tenderness and flavor. Starting with high heat for searing creates a savory crust that locks in the natural juices of your London broil. Like with brisket, maintaining a low and steady temperature during extended cooking allows connective tissues to break down for maximum tenderness.

Fast & Accurate: Get precise readings in just 1 second with ±0.9°F accuracy. NSF Certified for trusted food safety, this digital food thermometer features a 4.3 inches food-grade stainless steel meat probe, perfect for grilling, frying, baking, making candy and more

【8X Faster + 4X More Precise】: Upgraded with an industrial-leading professional thermocouple sensor, Themomonster meat thermometer digital with NIST certified ±0.5℉ precision provides you the accurate temperature of your food in just 0.5 Seconds.

【Fast & Accurate】Our meat thermometer digital delivers accurate readings within ±1°F in just 1–2 seconds, with a wide temperature range of -58°F to 572°F (-50°C to 300°C). No more waiting over the heat - know your food's exact temperature instantly.
Resting and Slicing for Optimal Results
The moment you pull that London broil off the grill, you’ve got to resist the urge to slice into it immediately—that’s where amateur mistakes happen. Rest your steak for 8-10 minutes loosely tented with foil. This pause isn’t optional; it allows juices to redistribute evenly throughout the meat while temperature carryover adds 5-10°F internal heat, ensuring perfect doneness without overcooking.
After resting, transfer your steak to a cutting board. Here’s the critical part: slice against the grain at a 45-degree slicing angle, cutting 1/4-inch thick pieces. This technique prevents toughness and enhances tenderness. Skipping the resting period is the most common mistake home cooks make when preparing London broil. London broil refers to a cooking method using tough cuts like flank steak or top round rather than a specific cut of meat. Before serving, drizzle pan drippings or compound butter over your slices to lock in moisture. For precision in achieving the perfect level of doneness, consider using an instant-read thermometer to verify your steak has reached the desired internal temperature before resting. When checking doneness, aim for an internal temperature between 130 and 135 degrees Fahrenheit for medium-rare results. Just as with grilled chicken, monitoring internal temperature is crucial to avoid overcooking and ensure your meat stays juicy and flavorful. For an elevated finishing touch, top your sliced steak with garlic-herb butter that melts into every crevice. Slicing against the grain is especially important for achieving tender results with tougher cuts. Proper resting and precise slicing techniques transform a good steak into an exceptional one.