
You can attach a rotisserie kit to most modern pellet grills, though compatibility depends entirely on your grill’s make and model. Yoder, Traeger, Masterbuilt, and Weber all offer model-specific rotisserie systems with heavy-duty construction. You’ll need to verify your grill’s exact model before purchasing, as weight capacities vary considerably—ranging from 10 to 55 pounds. Proper installation guarantees excellent performance and cooking results. Understanding your specific grill’s requirements will help you optimize this versatile cooking accessory.
Compatibility Guide for Popular Pellet Grill Brands
Before you invest in a rotisserie attachment, you’ll need to ascertain that it’s compatible with your specific grill model—not all pellet grills accept these accessories. Yoder Smokers accommodate the YS480, YS640, YS1500, and Cimarron models with heavy-duty brackets. Weber’s Searwood 600 pellet grill exclusively pairs with their rotisserie system. Traeger offers model-specific compatibility: the Pro 575, Pro 780, Pro 22, and Timberline 850 each support designated accessory lineups. Masterbuilt’s Gravity Series 560, 600, 800, 1050, and 1150 integrate seamlessly with their rotisserie kits.
Beyond compatibility verification, you’ll need to understand maintenance requirements and care and cleaning protocols specific to your attachment. Most systems feature electric motors requiring periodic inspection, while stainless-steel components demand regular cleaning to prevent corrosion and guarantee longevity. For optimal durability, consider stainless steel construction which resists rust and maintains performance over extended use. Premium rotisserie units incorporate integrated heavy-duty rotisserie drivetrains designed for durability and long-term reliability. When selecting a motor, ensure it provides adequate torque for your meat weight to maintain consistent rotation throughout the cooking process. The motor should be checked regularly for signs of wear or damage to ensure optimal performance and safe operation. The rotisserie’s self-basting action continuously rotates your meat for even cooking and juicy results throughout the cooking process. Rotisserie attachments work best on pellet grills with dedicated side burners or zones that allow you to manage direct heat separately from the rotating meat. Like other Kamado grill accessories, rotisserie attachments enhance your outdoor cooking versatility and allow you to expand your recipe repertoire beyond traditional grilling methods.

【Compatible Models】This rotisserie kit is worked for Traeger Pro 22, Pro 575, Pro 780 Series Wood Pellet Grill and Smoker. ★NOTE: ONLY FOR THESE 3 MODELS, CHECK YOUR GRILL BEFORE ORDERING!
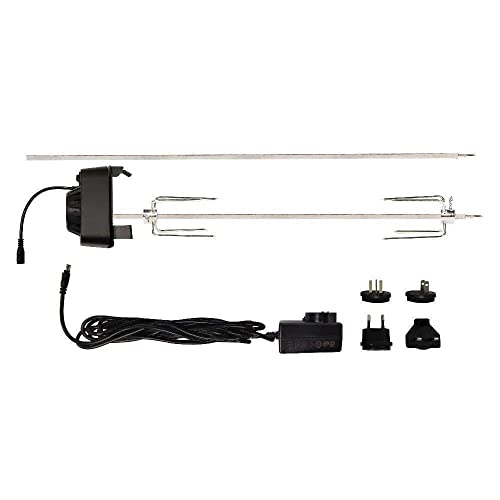
Fits the Gravity Series 560, 800, and 1050 Digital Charcoal Grill + Smoker
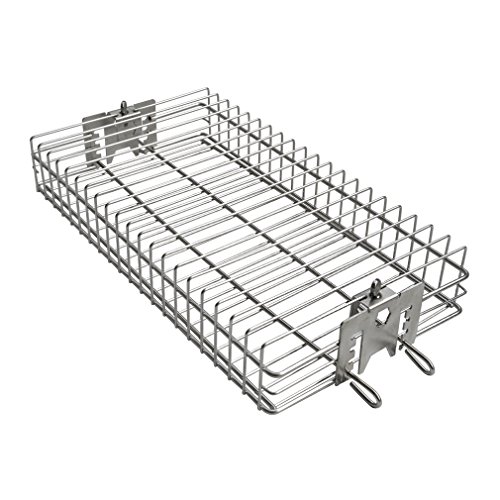
Made of great durable stainless steel construction, long lasting
Key Features of Rotisserie Kits
When you’re evaluating rotisserie attachments for your pellet grill, understanding their core features will help you determine which kit delivers the performance and durability you need.
You’ll find that heavy-duty stainless-steel construction provides exceptional material durability against outdoor elements and corrosion. The 3-piece hex spit rod design adapts to grills ranging from 24″ to 56″, while dual stainless forks and guide bushings secure your meat during rotation. With a maximum weight capacity of 50 pounds, these attachments can handle large roasts and whole turkeys with ease.
A powerful 110V gear motor delivers consistent, smooth rotation for even cooking between 275–350°F. The self-basting action continuously rolls juices across your food’s surface, producing tender, flavorful results. This universal fit design works seamlessly across all Yoder Smokers pellet grill models, including the YS480, YS640, YS1500, and Cimarron. Like traditional charcoal smokers, temperature control remains essential for achieving optimal results with rotisserie cooking. For best results, you’ll want to monitor rotisserie motor reliability throughout the cooking process to ensure consistent rotation.
You’ll appreciate the simple installation process that requires no complex modifications. The pre-drilled spit rod hole eliminates cutting, and side shelf compatibility remains intact after installation, ensuring your rotisserie kit doesn’t compromise existing functionality. Many modern pellet grills offer adjustable smoke levels to complement rotisserie cooking for enhanced wood-fired flavor. When selecting your rotisserie kit, prioritize build quality and ignition reliability just as you would when choosing a portable grill for your outdoor cooking needs. These rotisserie kits provide the same versatility and durability found in top-rated propane gas grills that combine multiple cooking functions for various backyard applications.
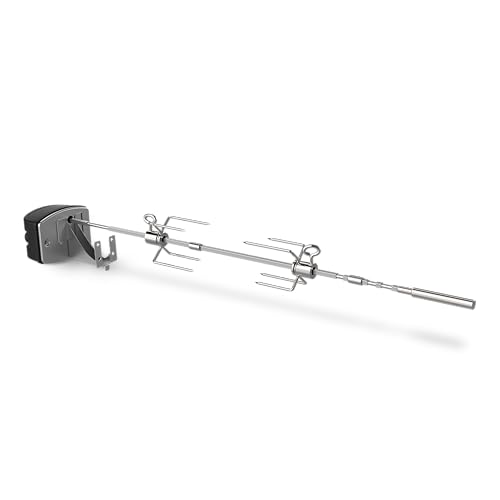
Fits Searwood 600 pellet grill and Spirit gas grills
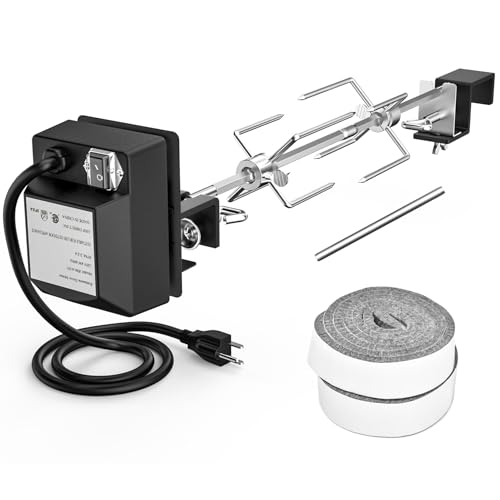
Robust Stainless Steel Construction: Built from heavy-gauge stainless steel with outstanding heat resistance and rustproof performance, stable for long-term kamado high-temperature barbecue use.

✅The spite rod holder comes with 5 slots for adjustable grill poles of different lengths to fit a wide range of grills. The barbecue rods are designed with screws together for easy storage, and the motor with insulated housing and a waterproof switch makes it safer to use in the kitchen.
Weight Capacity and Load Limits
Understanding your rotisserie kit’s weight capacity is just as important as its motor specifications and construction quality, since overloading the spit directly compromises both safety and cooking performance. Weight limits vary considerably across brands—Weber models max out at 20 lb, while Yoder’s YS480 S-Series handles up to 55 lb. Green Mountain Grills support 24 lb, and Masterbuilt’s Gravity Series tops at 10 lb. Industry standards typically range from 25–50 lb depending on motor durability and design. Exceeding your kit’s rated capacity risks motor failure and dangerous load balancing issues. Spirit II rotisseries have a more restrictive 10 lb maximum, making them better suited for smaller cuts of meat. The Bull 30″ rotisserie kit maintains a maximum capacity of 20 pounds to ensure proper motor performance and safety during operation. Premium built-in grills like True Flame’s TF40 often include optional rotisserie attachments designed to handle heavier loads when integrated into custom outdoor kitchen setups. Many high-performance gas grills feature dedicated rotisserie burners that complement their primary cooking capabilities for comprehensive outdoor entertaining. When selecting among top rotisserie models, comparing rotisserie motor quality across different price points helps ensure you choose an attachment that matches your cooking needs. Rotisserie attachments are frequently offered as optional extras on popular outdoor grill models alongside other accessories like griddles and side burners. Just as selecting the right grill cover material protects your equipment from the elements, choosing a rotisserie with appropriate weight capacity ensures long-term durability and safe operation. You’ll want to verify your specific model’s maximum weight before cooking, ensuring the motor maintains consistent rotation speed and reliable performance throughout your cook.
Cooking Techniques and Temperature Settings
Once you’ve secured your meat and verified the weight doesn’t exceed your rotisserie kit’s capacity, you’ll need to dial in precise temperature settings to achieve ideal results. Start with 350°F for whole rotisserie chicken, cooking for 2 to 2.5 hours until reaching 165°F internally. For chicken quarters at higher heat, use 400°F for approximately one hour. You can also employ indirect cooking between 275–350°F with a diffuser installed. Maintain temperature monitoring throughout cooking, keeping your lid closed to preserve heat consistency. Position a drip pan beneath the meat to catch juices and prevent flare-ups. Trussing the chicken is the first and most critical step before securing it onto the rotisserie rod. Like other specialized chicken holders, rotisserie attachments provide space-saving benefits for upright cooking, similar to how portable gas griddles maximize cooking surface in compact outdoor setups. For those seeking to accommodate larger groups, consider how rotating skewer systems like commercial rotisserie options can cook multiple items simultaneously while maintaining consistent results. Stainless steel construction on your rotisserie components ensures heat tolerance and easy cleaning during and after your cooking session. Perform regular food safety checks by verifying internal temperature reaches at least 165°F before removal. This precision prevents undercooked poultry while ensuring best moisture retention. At moderate heat settings around 275°F, you can expect approximately 25 minutes per pound of cooking time, balancing shorter cook times with juiciness and crispy skin results. Remove the cooking grates if needed to create space for the food to rotate freely without obstruction.
Step-by-Step Installation Process
With your temperature strategy locked in, you’ll now need to properly install the rotisserie attachment to guarantee safe, reliable operation. Begin by positioning your left-side bracket on the second shelf rail opposite the smokestack. Secure it firmly with hardware, ensuring no movement when tugged.
Next, assemble your spit rod by sliding forks onto it and threading the counterweight onto the rod’s end. The newer model design features a one-piece rotisserie rod that provides enhanced stability compared to older two-piece designs. Verify power source compatibility before sliding the motor onto the mounting bracket. Insert the spit’s pointy end into the motor, resting the opposite notch into your grill groove. Ensure the tightening screw aligns with the flat side of the spit rod to prevent the forks from slipping during operation.
Achieve proper motor alignment by leveling the spit rod across your grill’s sides. Tightening the collar screw with the inner ring aligned ensures smooth rotation. For compact pellet grills with space constraints, consider how interior height limits may affect your rotisserie clearance during operation. Like pizza stones designed for high-heat performance, rotisserie components must withstand consistent exposure to intense temperatures during extended cooking sessions. The rotating spit will cook your food through conduction, convection, and radiation as the meat spins and moves through the heat zone. Before beginning operation, start on low or smoke mode for optimal ignition and heat circulation. Consider investing in protective gloves to safely handle hot components during installation and operation. Finally, test the motor’s operation and confirm all components remain secure under load simulation.

Most Popular Rotisserie Bundle: Includes the ROTO-Q 360 Basic Set and the Rotisserie Basket, offering the ultimate versatility for grilling and roasting.

【Perfectly Cooked Rotisserie Delights】Our adjustable rotisserie grill kit delivers mouth-watering rotisserie roasts that are succulent, flavorful, and evenly cooked. Experience the joy of indulging in tender and juicy meats, elevating your grilling game to new heights. This versatile kit is compatible with popular grill brands, Please ensure fit for your rotisserie machine.
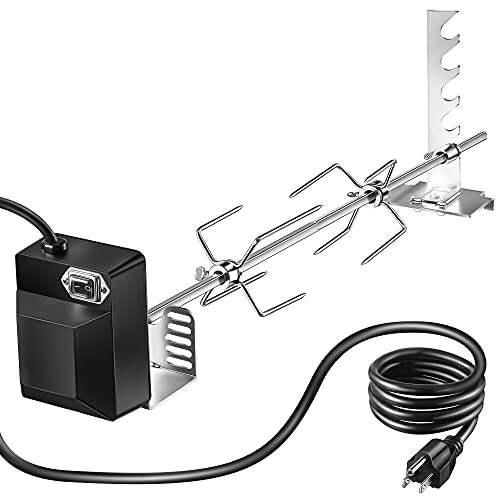
Complete Rotisserie Grill Kit: this universal grill rotisserie kit comes with a total of 23 pieces including 1 piece 120V 4W rotisserie motor, 2 pieces 14-inch skewers that can be spliced, 2 pieces 4-prong forks, 1 piece shaft, 14 pieces fixing screws, 1 motor holder, and 2 spit rod supports. Designed as a full outdoor rotisserie grill with motor, it fits most 2- to 6-burner grills regardless of brand, giving you everything you need for delicious spit-roasted meals at your backyard BBQ party
Pricing and Where to Buy
How much you’ll spend on a pellet grill rotisserie attachment depends largely on your grill’s brand and the kit’s capacity. Budget models start around $80–$90, while mid-range options like Weber’s run $129.99. Premium kits from Yoder Smokers reach $295. The GMG Prime Plus rotisserie attachment is priced between 89.99 – $99.99 and features a 110V motor enclosed in stainless steel housing. You’ll find these attachments at specialty BBQ retailers, major home improvement chains like Ace Hardware, Walmart, and direct manufacturer websites. Green Mountain Grills kits work with GMG Prime Plus and Prime 2.0 models, while Yoder’s universal kit fits multiple smoker sizes. Popular pellet grill brands like Traeger and Pit Boss also offer compatibility considerations when selecting rotisserie attachments for your specific model. The Rotisserie Skewer Set is available at 64.99, offering an affordable alternative for those seeking basic rotisserie functionality. For optimal results with your rotisserie attachment, consider pairing it with quality smoking wood such as post oak to enhance your meat without overpowering the natural flavors. Top choices like B&B Post Oak Pellets are praised for their pure oak wood with no additives, delivering flavorful smoke ideal for beef and pork. Many outdoor cooking setups benefit from 304 stainless steel components, which provide superior corrosion resistance and durability in weather-exposed environments. Before purchasing, verify warranty information and confirm the kit’s load capacity matches your cooking needs. Inquire about cleaning and maintenance requirements, as stainless-steel components require proper care for longevity, similar to how fire-retardant, heat-resistant covers protect your grill investment from the elements.

110V electric rotisserie motor. Easy to use and convenient, unlike the cordless version, you don't need to change the battery oftenly. 4 watt motor keeps the rotisserie turning at a sustained, constant rate, ensuring every inch of the meat is evenly cooked and succulently moist. Holds up to 20 lbs of food, BUT NOT recommend to cook whole lambs or pigs.

Grilling rod trussing part adopts precision production to enhances the stable characteristics and high reliability

【Package Include】 1*28" Hexagon Spit rod, 1*110V electric rotisserie motor, 1*motor bracket, spit rod support brackets(A,B,C), 2*meat forks, 1*rotisserie handle and other necessary accessories for installation.